• Today we are open from 7:30am to 5.00pm

  • Call Us: (02)43067065

Custom Quad Builds – Taranis Sound Pack and Uploading Preconfigured Models To Taranis X9D

Please note that this guide was created for our custom builds for Customers so they can simply drag in our models, bind their receiver to their new quad and start flying.
You may use these models as templates for your own quads but we will not be responsible for any mishaps you cause.

How to upload Taranis Sound Pack

  1. Hold the YAW RIGHT trim and ROLL LEFT TRIM (Mode 2) together and turn on Taranis
  2. Plug in USB to back of Taranis
  3. It should now appear as a folder under My Computer (Windows)
  4. Download Sound Pack here.
  5. Extract it on your computer.
  6. Upload it to DRIVE LETTER:\SOUNDS\en
  7. Success! – Keep Taranis Plugged in for Next Step

How To Upload Our Models To Your Taranis

  1. Make sure you have Taranis Open TX Companion Installed
  2. You may also need the driver “ST Virtual COM port driver V1.3.1 for Taranis CLI” from that same link above (at the bottom of the page)
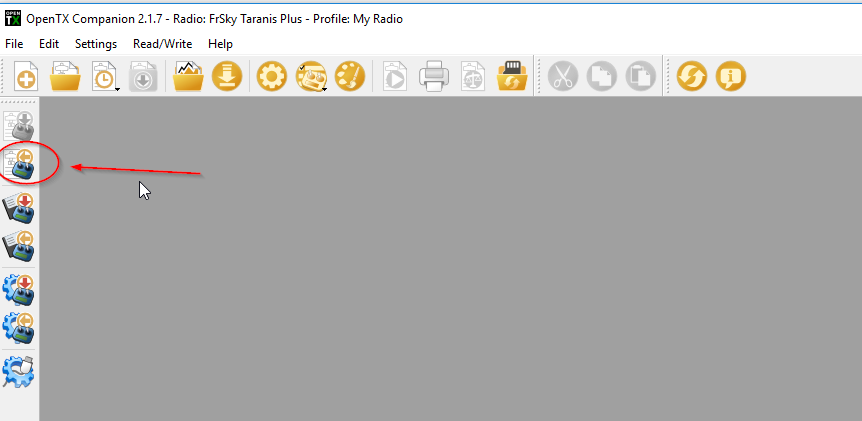
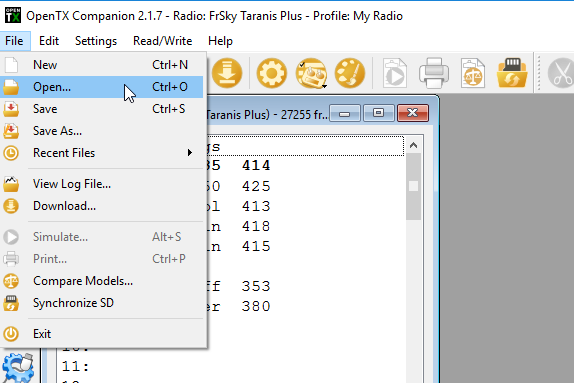
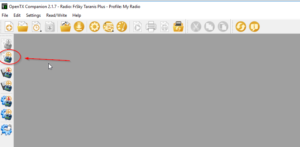
  3. Launch Open TX Compansion
  4. Click Read Models & Settings From Radio
    2016-06-07 18_41_50-OpenTX Companion 2.1.7 - Radio_ FrSky Taranis Plus - Profile_ My Radio
  5.  Now you should see a window with your models.
  6. Now download our Model Pack Here
  7. Go back to Open TX Companion and go to file—> open and select the file you just downloaded.
    2016-06-07 18_58_11-OpenTX Companion 2.1.7 - Radio_ FrSky Taranis Plus - Profile_ My Radio
  8. You should now have another window to the right with our Models.
    2016-06-07 22_53_23-OpenTX Companion 2.1.7 - Radio_ FrSky Taranis Plus - Profile_ My Radio
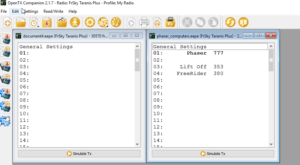
  9. Simply drag our models across to slots on yours
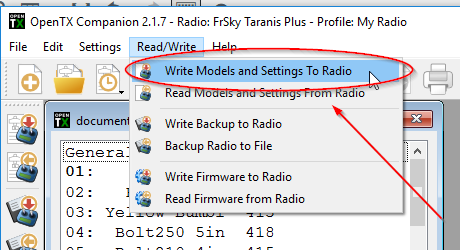
  10. When you are done, close our models and go to the menu at top —> Read / Write —> “Write settings and models to Radio”
    2016-06-07 18_59_41-OpenTX Companion 2.1.7 - Radio_ FrSky Taranis Plus - Profile_ My Radio

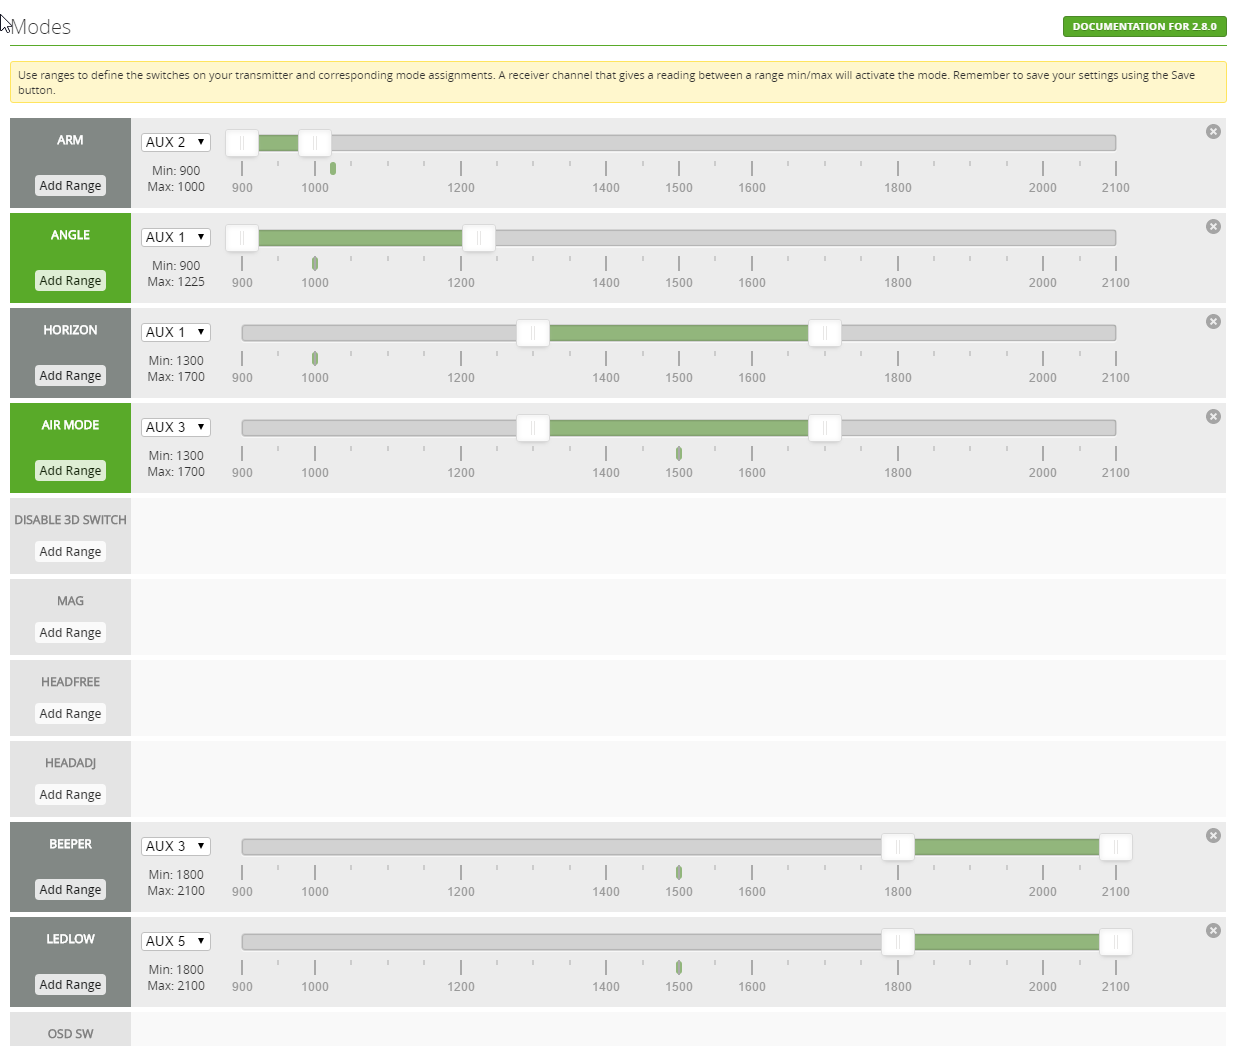
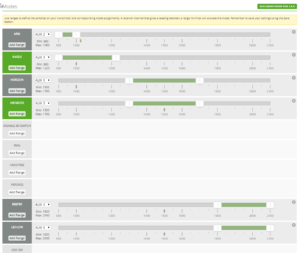
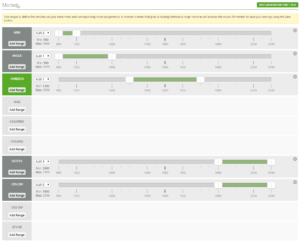
NOTE: Once you are using our Taranis model and betaflight setup below, this is the switch configuration

CH5 = AUX 2 = ARM = SF
CH 6 = AUX 1 = Modes = SC
CH 7 = AUX 3 = Air Mode/Buzzer = SD
CH 8 = AUX 4 = Nothing Setup = SA
CH 9 = AUX 5 = LED Strip = SB
CH 10 = AUX 6 = Nothing Setup = SE

Other Features
S1 is volume of your Taranis
All Switches tell you when armed, disarmed and what mode etc.
SH Switch says current Battery Voltage
Voltage warnings will occur at 14.4, 13.6 and 13.65
SG Position 2 and 3 will play your favourite songs
SE Position 3 will cheer your mates when they crash.

Cleanflight Backups of prebuilds we have done

Please note that these are full restore settings for Firmware listed.
These can be used as a base for your tune as well, however no two crafts fly the same due to many variables such as battery weight and other factors
These are also set up to mirror our Models from Taranis as per above, so please check all your modes/switches if using different transmitter/setup.

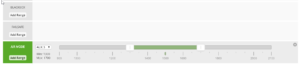
Screenshot of how modes should be setup if using Taranis Profile

Betaflight:
cleanflight_modes_taranis_setup

Cleanflight
cleanflight_modes_1
cleanflight_modes_2

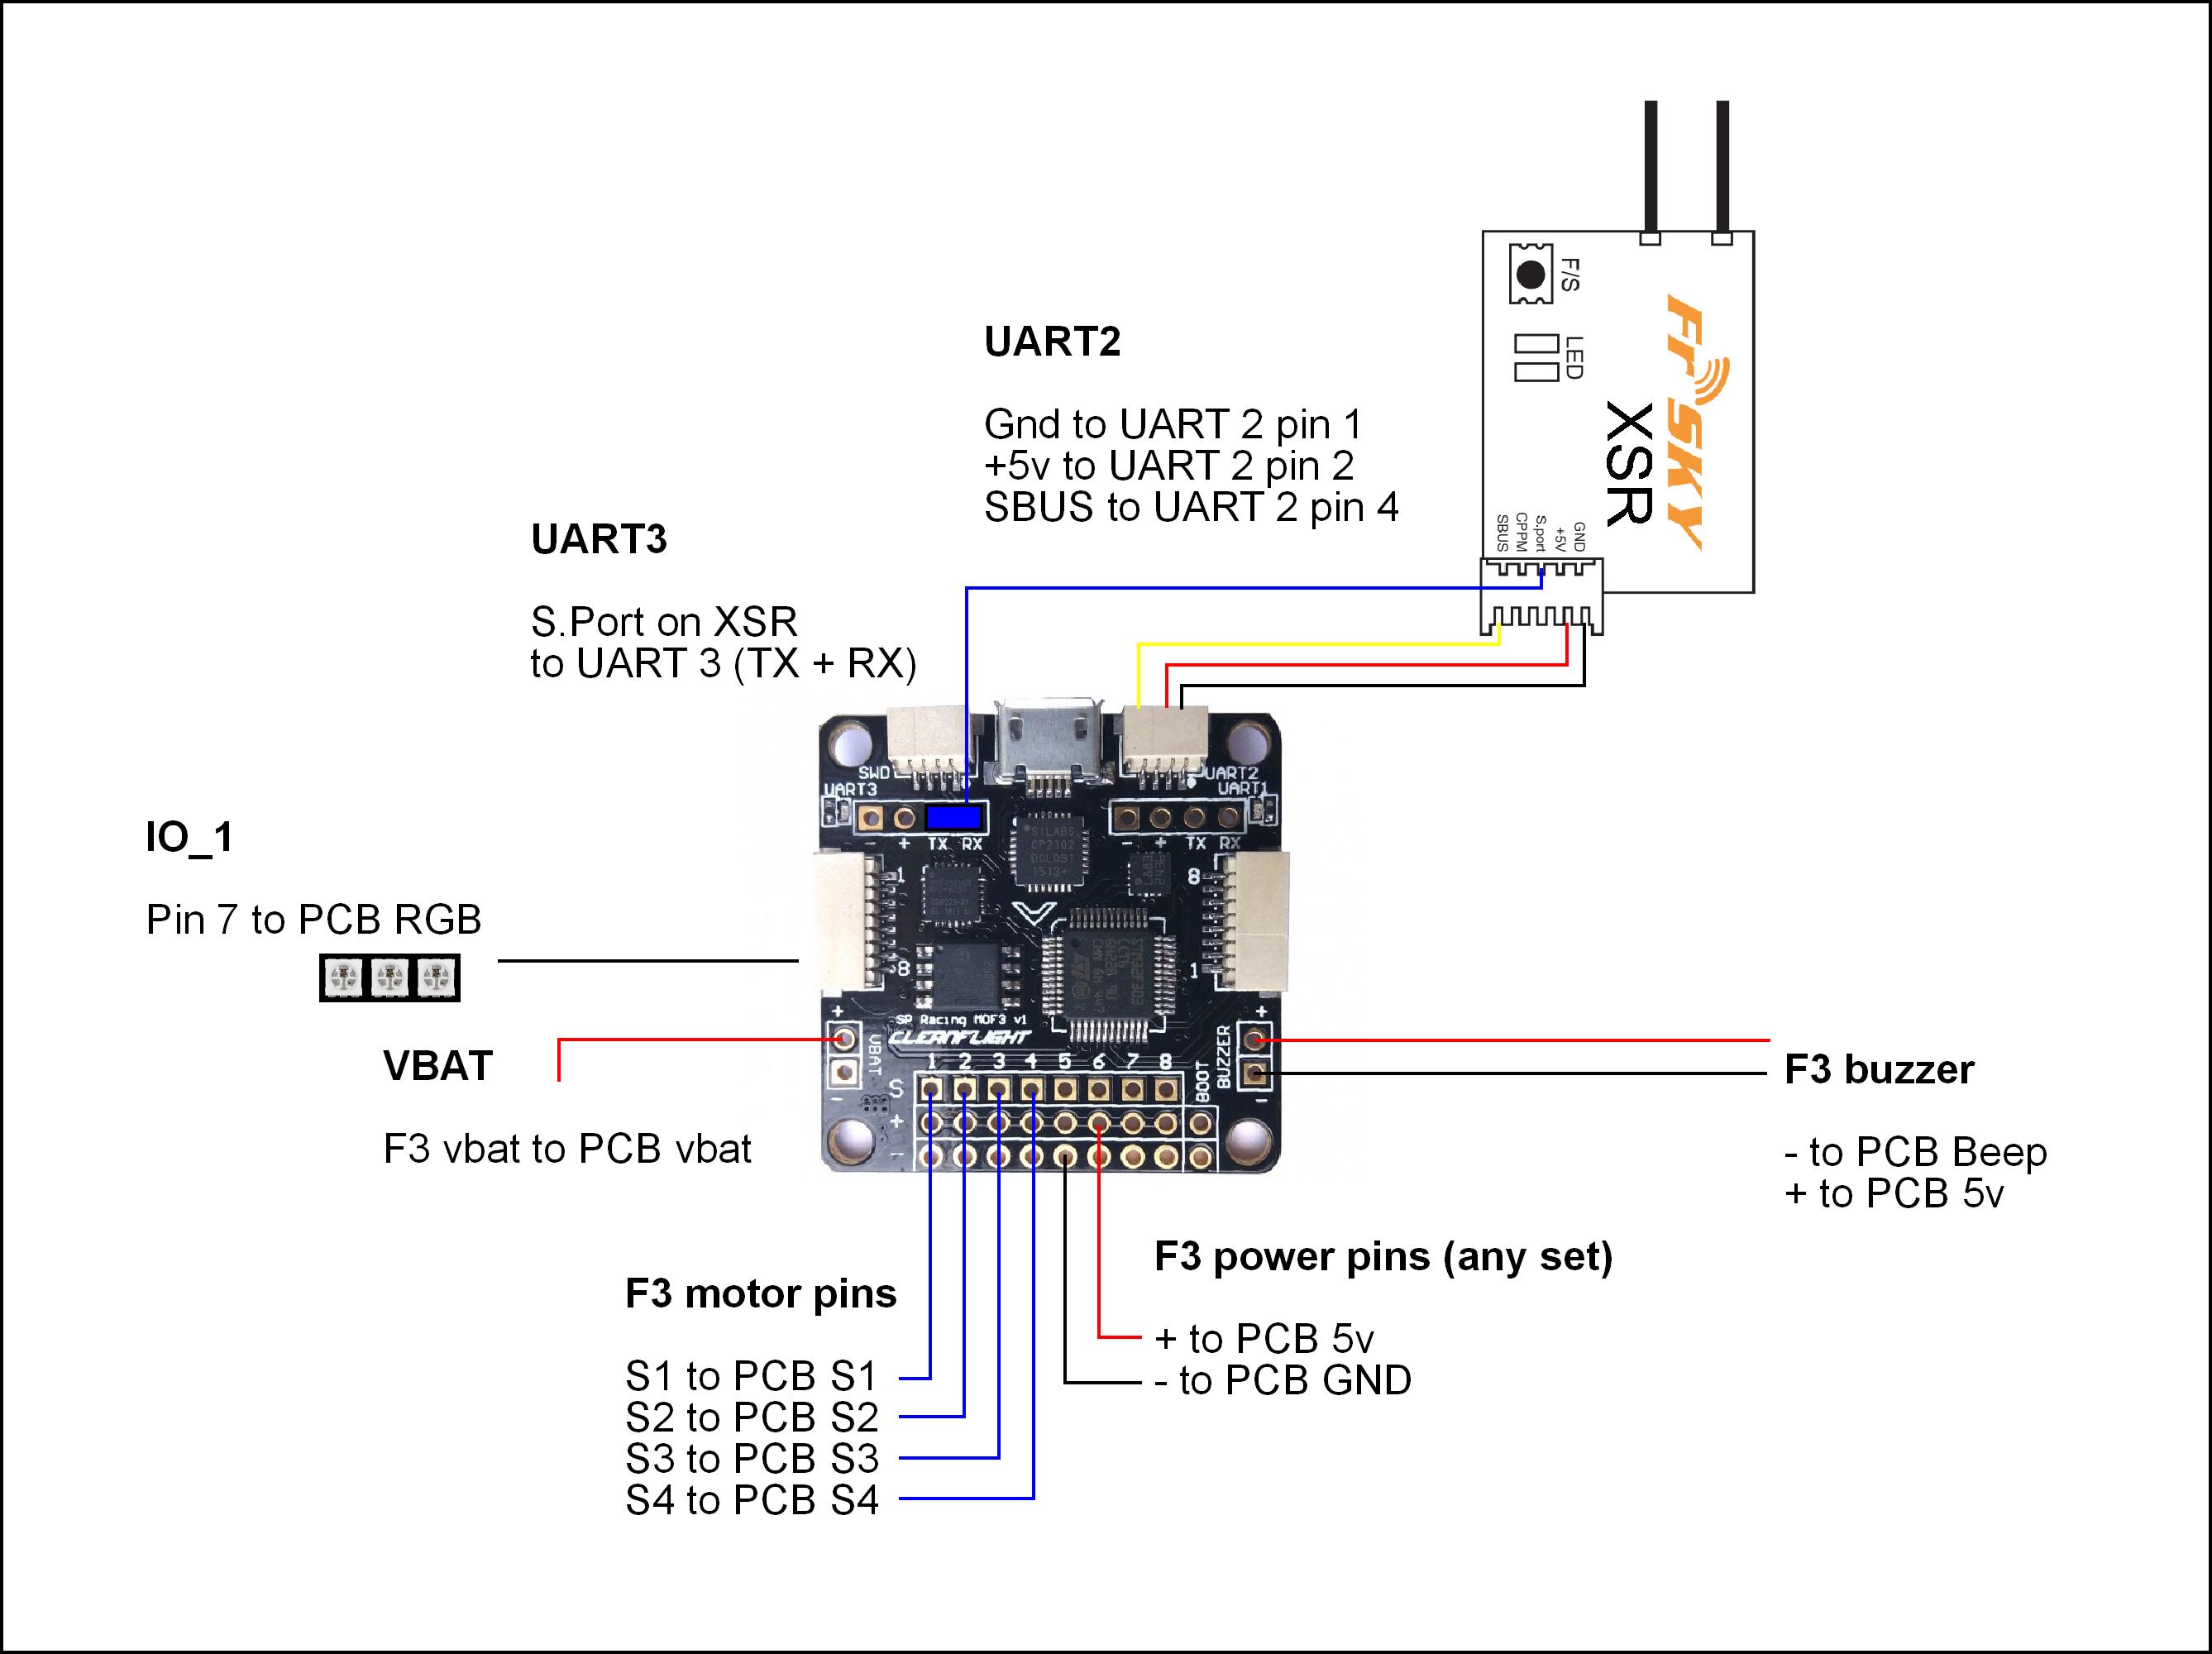
Emax X5 – Cleanflight 1.13 |EMAX F3 FC SBUS

Emax X5 – Cleanflight 1.13 |EMAX F1 + OSD FC PPM

Emax X6 – Betaflight 2.8 – Coming Soon

Sigan210 – Betaflight 2.8 – Coming Soon
Sigan250 – Betaflight 2.8 – Coming Soon
BoltRC Kraken – Betaflight 2.8 – Coming Soon

Eachine Falcon 180 RTF Naze32 Review – Guide To How It Should Have been Setup – With Cleanflight

Last Updated 14th June 2016

Here I will address quite a few problems with the Eachine Falcon 180, and walk you through fixing them.

If you have never upgraded or used Cleanflight, the details may be very technical, but I will try my best for step by step instructions.

Let me address some of them here as well as screenshots of all the default settings at the bottom. I will attempt to rectify and help Blade185 buyers fix most of the issues I have found. Continue reading “Eachine Falcon 180 RTF Naze32 Review – Guide To How It Should Have been Setup – With Cleanflight” »

Eachine Blade 185 Review – Guide To How It Should of Been Setup With Cleanflight

Eachine have been getting better at building Quads, but for the life of me I can’t understand why they still get so many basic things wrong.

Let me address some of them here as well as screenshots of all the default settings at the bottom. I will attempt to rectify and help Blade185 buyers fix most of the issues I have found. Continue reading “Eachine Blade 185 Review – Guide To How It Should of Been Setup With Cleanflight” »

How to calibrate ESCs when your Flight Controller powers the ESC

For some strange reason which I have yet to identify… my ESC was powered when FC was hooked up to computer. This meant I could not drag sliders to MAX, plug in battery as when i dragged to max, the motor would spin and not engaged the calibration.

To solve this I had to do it a manual way using CLI commands. Continue reading “How to calibrate ESCs when your Flight Controller powers the ESC” »

How to update Firmware on SP Racing Flight Controller F3 to Betaflight / Cleanflight

Usually F3 boards will come with Cleanflight 1.9.0 and there has been a tonne of updates since then.

I tried flashing and kept getting the error “Communication with bootloader failed”

Download the latest Betaflight or Cleanflight from the website (at this time it is betaflight_2.6.1_SPRACINGF3.hex)

Then goto firmware on clean flight configuration tab and make sure you load the file then change the settings to this

-Full chip erase.

-Manual baud rate 256000.

Flash and it should work!