The following tutorial will place a DNS filter on your internet connection which can restrict the websites a computer or network can see.
Step 1: Sign up and create an account at open DNS here: https://store.opendns.com/get/home-free
Step 2: Change the DNS settings on your router or Home Computer.
Router: Log into the admin panel (eg 192.168.1.1) and find the DNS IP’s. It could be set to automatic or set manually.
You want to change the ip’s and set them manually to 208.67.222.222 and 208.67.220.220.
Once you have saved, please reboot your router.
(Changing it on your router gives the advantage that your whole network is protected no matter who logs on.)
Home Computer: Open up your network connections (Control Panel\Network and Internet\Network Connections)
Right click your active connection and select properties. Click on Internet Protocol Version 4. Now Click Properties. Under the General tab, at the bottom select the box that says “Use the following DNS server addresses:”
Now put the following ip’s in there: 208.67.222.222 and 208.67.220.220.
Click OK and now restart the computer.
(Changing it only on your computer has the disadvantage that only one computer is protected, and if the user knows what they are doing they can remove the filter)
Step 3: Log back into OPEN DNS – https://dashboard.opendns.com/ and sign in.
Step 4: Add your IP Address to Open DNS, (check your ip by going to http://www.whatismyip.com)
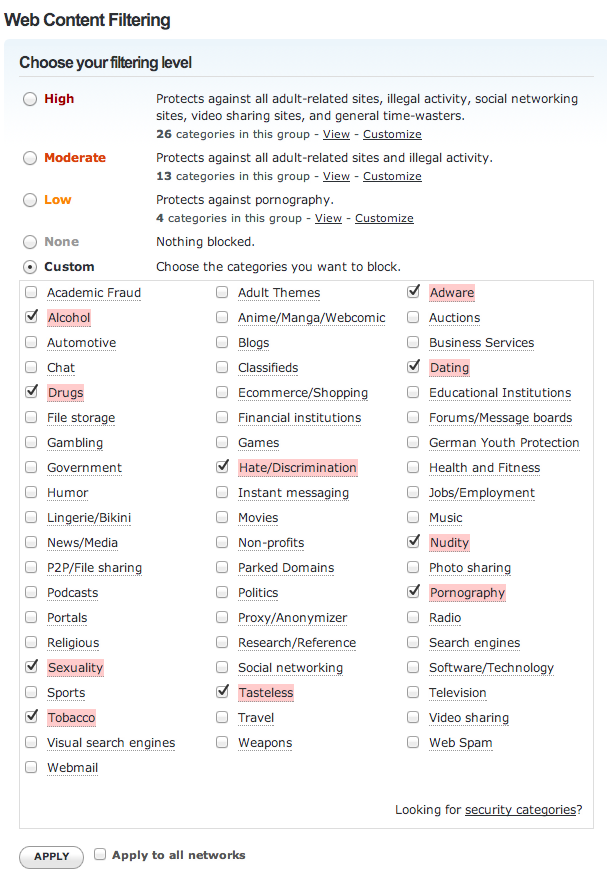
Step 5: Change the settings for your IP you just added and select what you would like to block. (see example below)
 Step 6: You are now good to go! Test that new filter is now working by visiting this page: http://www.opendns.com/welcome
If any of the above is too complicated we can do the following remotely for a fixed fee of $99. It can take anywhere from 30minute to 60 minutes to setup depending on your configuration.
