Last Updated 14th June 2016
Here I will address quite a few problems with the Eachine Falcon 180, and walk you through fixing them.
If you have never upgraded or used Cleanflight, the details may be very technical, but I will try my best for step by step instructions.
Let me address some of them here as well as screenshots of all the default settings at the bottom. I will attempt to rectify and help Blade185 buyers fix most of the issues I have found.
The Issues
- i6 Eachine transmitter has locked Bootloader by Default – Can’t change any settings
- AUX 1 is set to Knob VRA and it does nothing.
- AUX 2 is set to Knob VRB
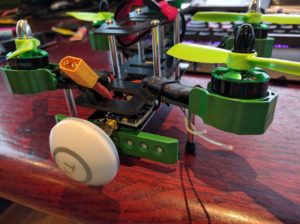
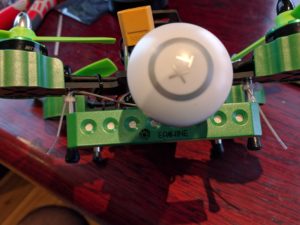
- LED Bar easily comes off
- Aerials aren’t mounted properly
- No Flight Modes set, only Acro Mode!
- Comes with default base flight instead of cleanflight and its Running old firmware released on: Aug 27 2015
The Solutions
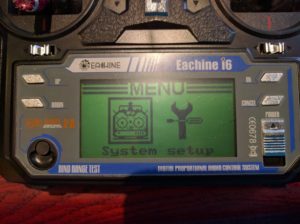
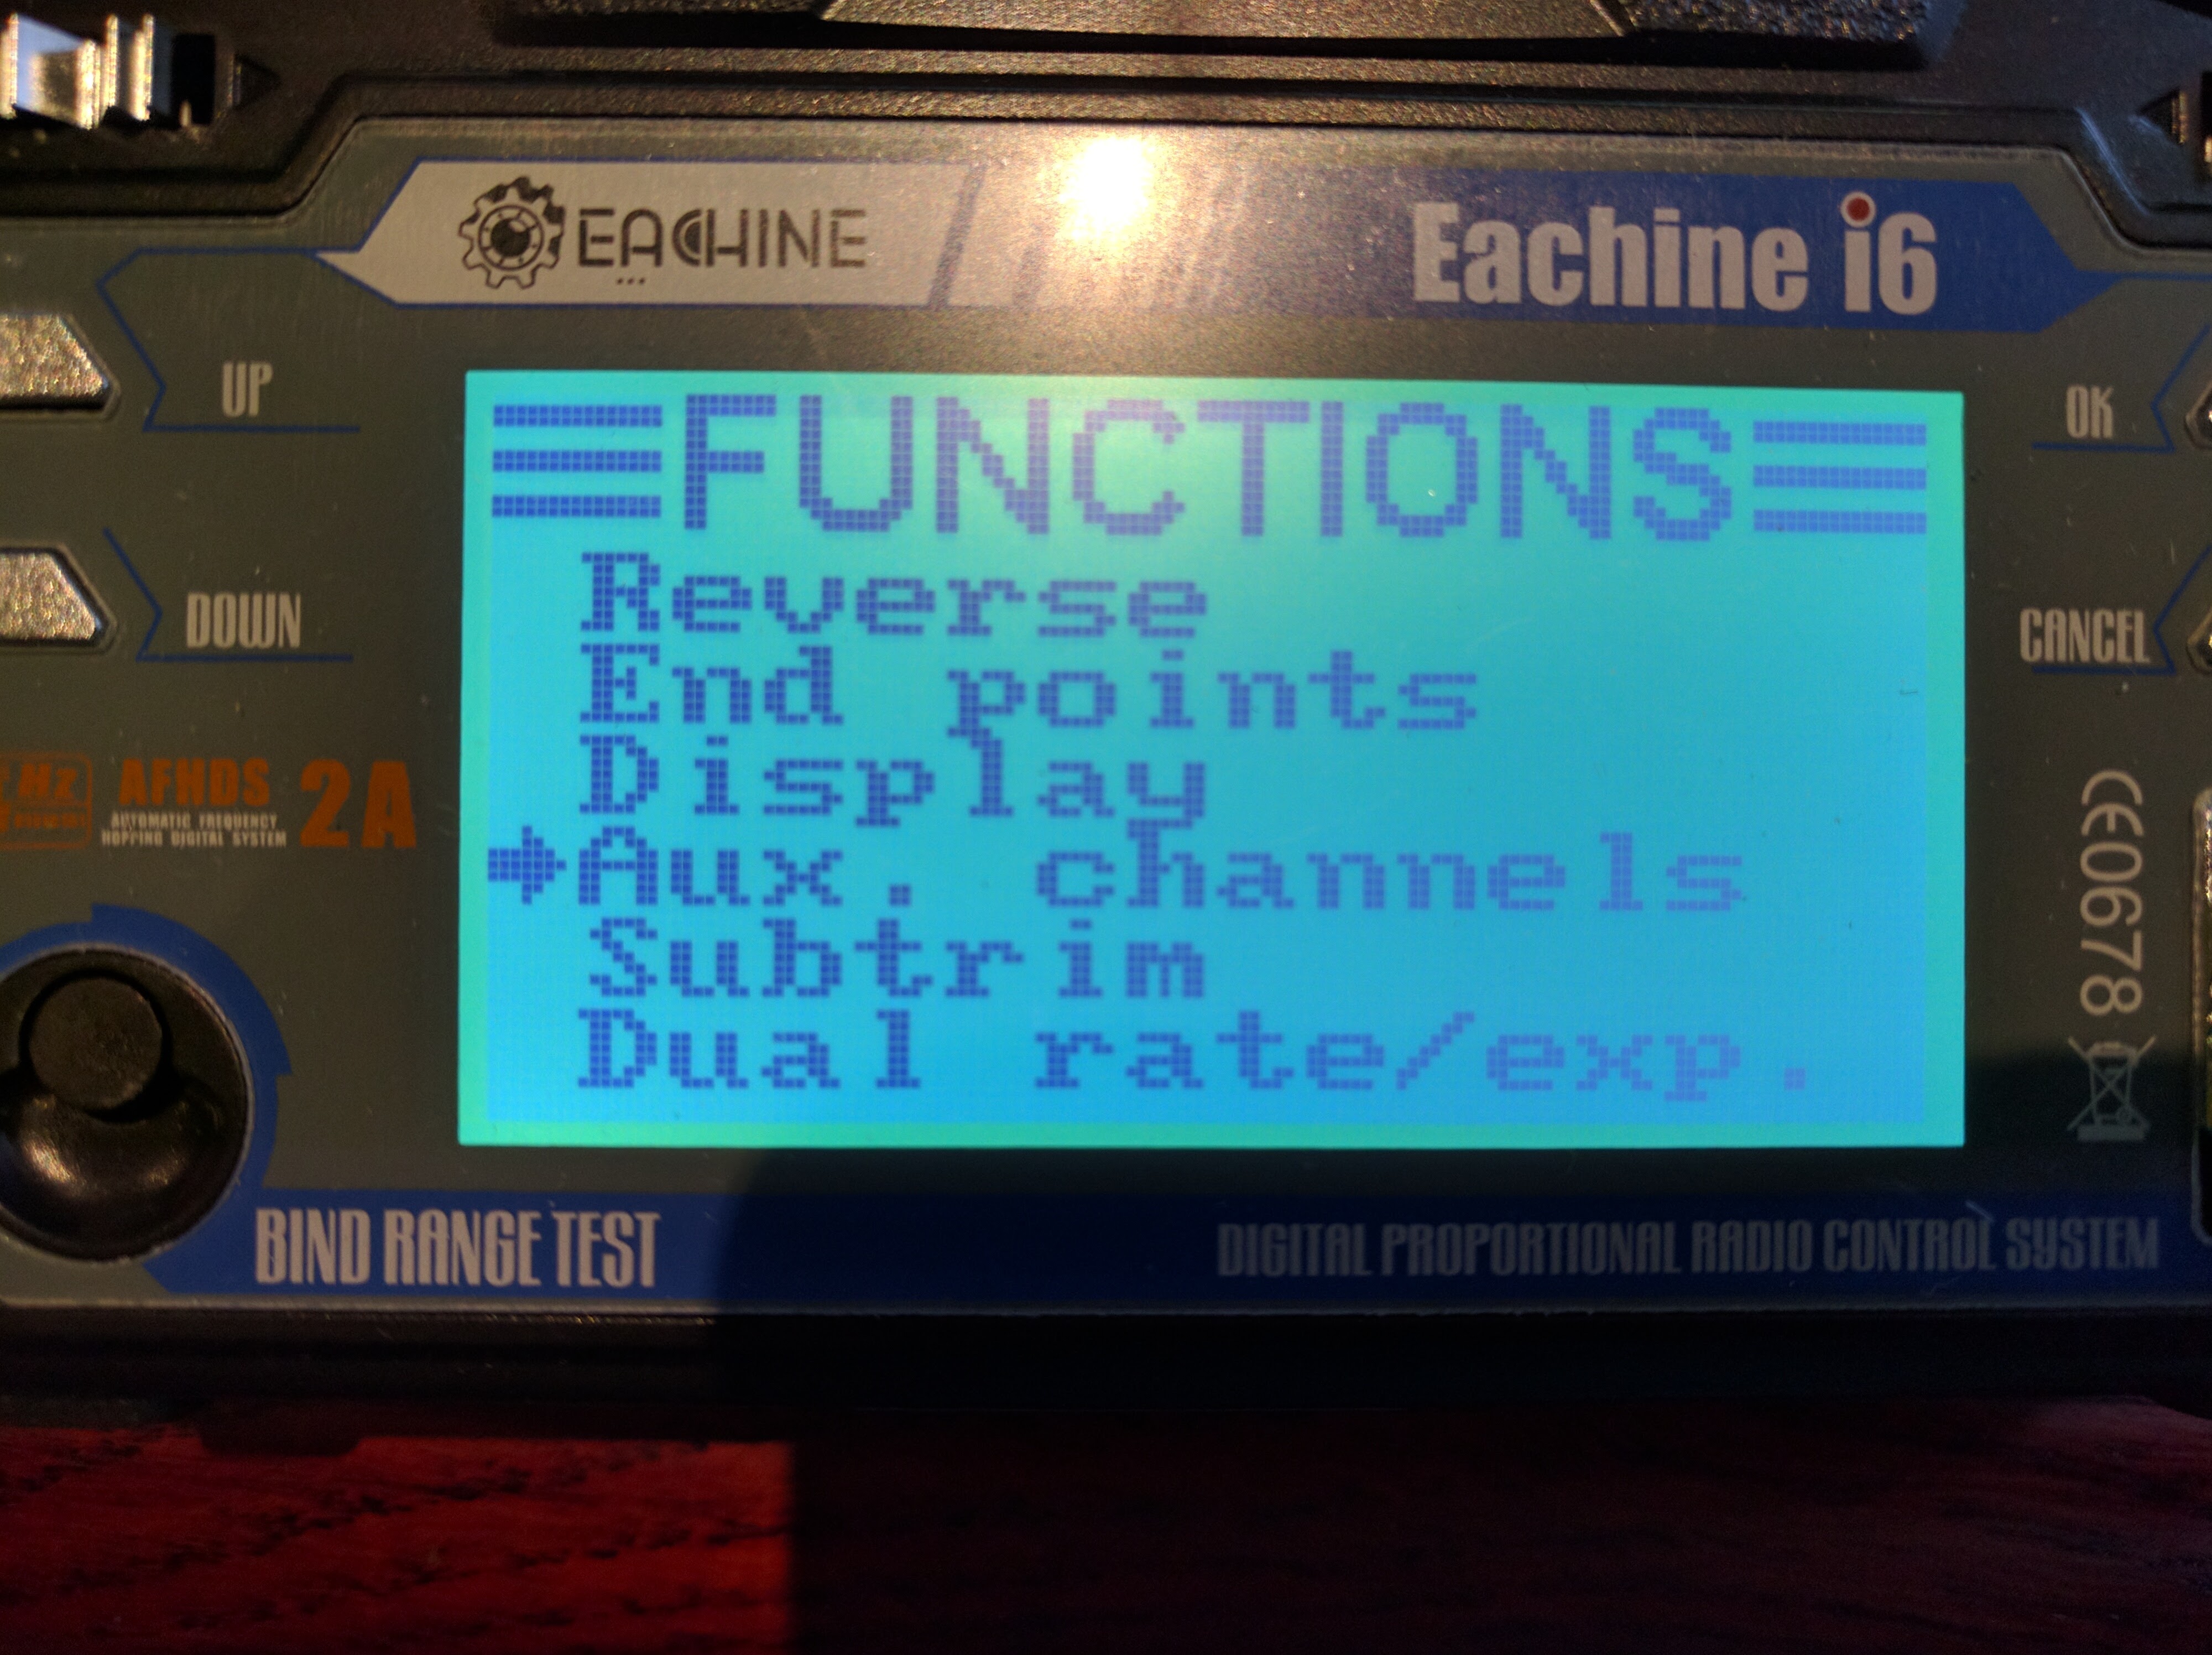
- To Change the Eaching i6 Transmitter settings, Hold the yaw trim to the right, the roll trim to the left and turn on the transmitter. You can then enter settings by holding down ok on the Transmitter
- Part of solution 3
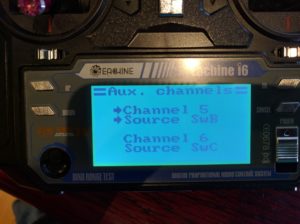
- Now that you can enter the setup of i6, goto Functions Setup, Aux Channels, then change Chanel 5 to SwB and Channel 6 to Swc. Hold down Cancel to SAVE. Switches for modes and settings are way better than turning Knobs!

- Simply put some hot glue on the led connection, this should give it some strength and stay attached in light crashes.

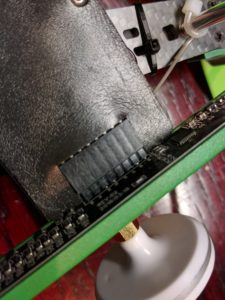
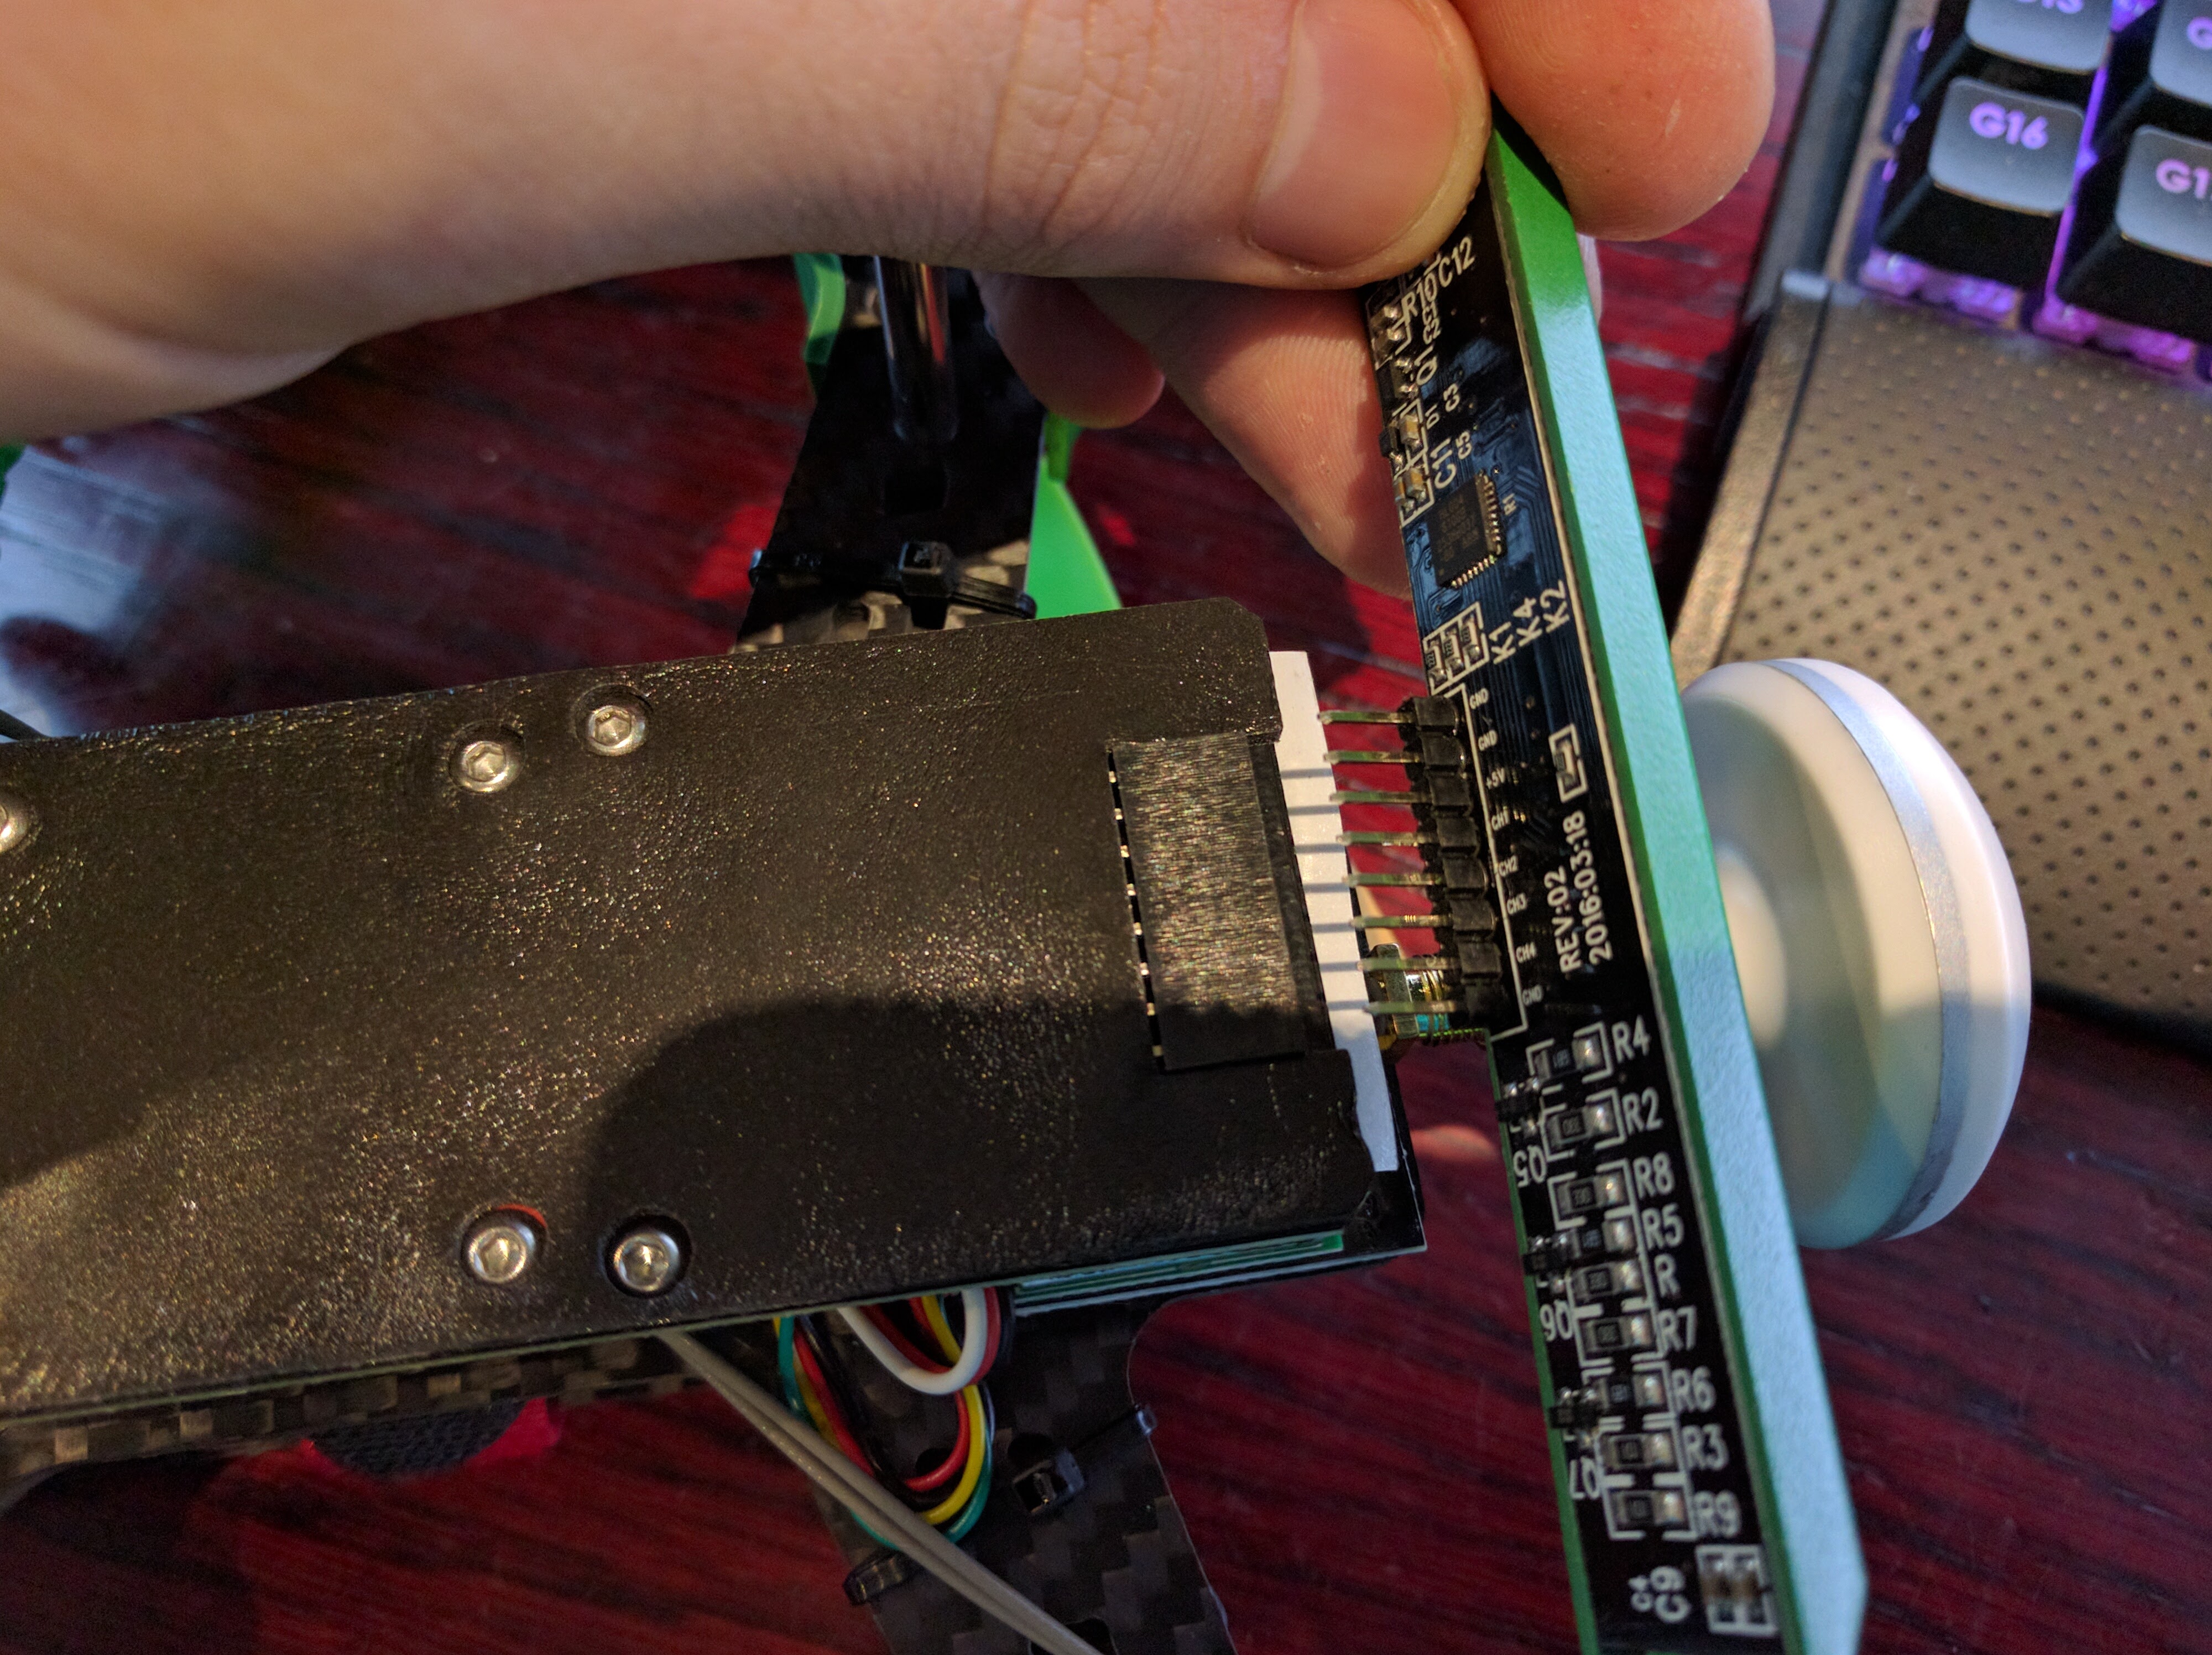
- Get the cable ties out push the antennas through the centre and out the back. There is lots of ways aerials can be remounted, mine is the 2 minute fix.
Cables come like this

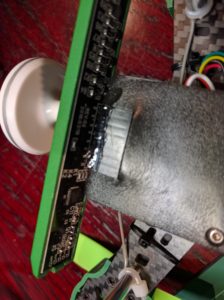
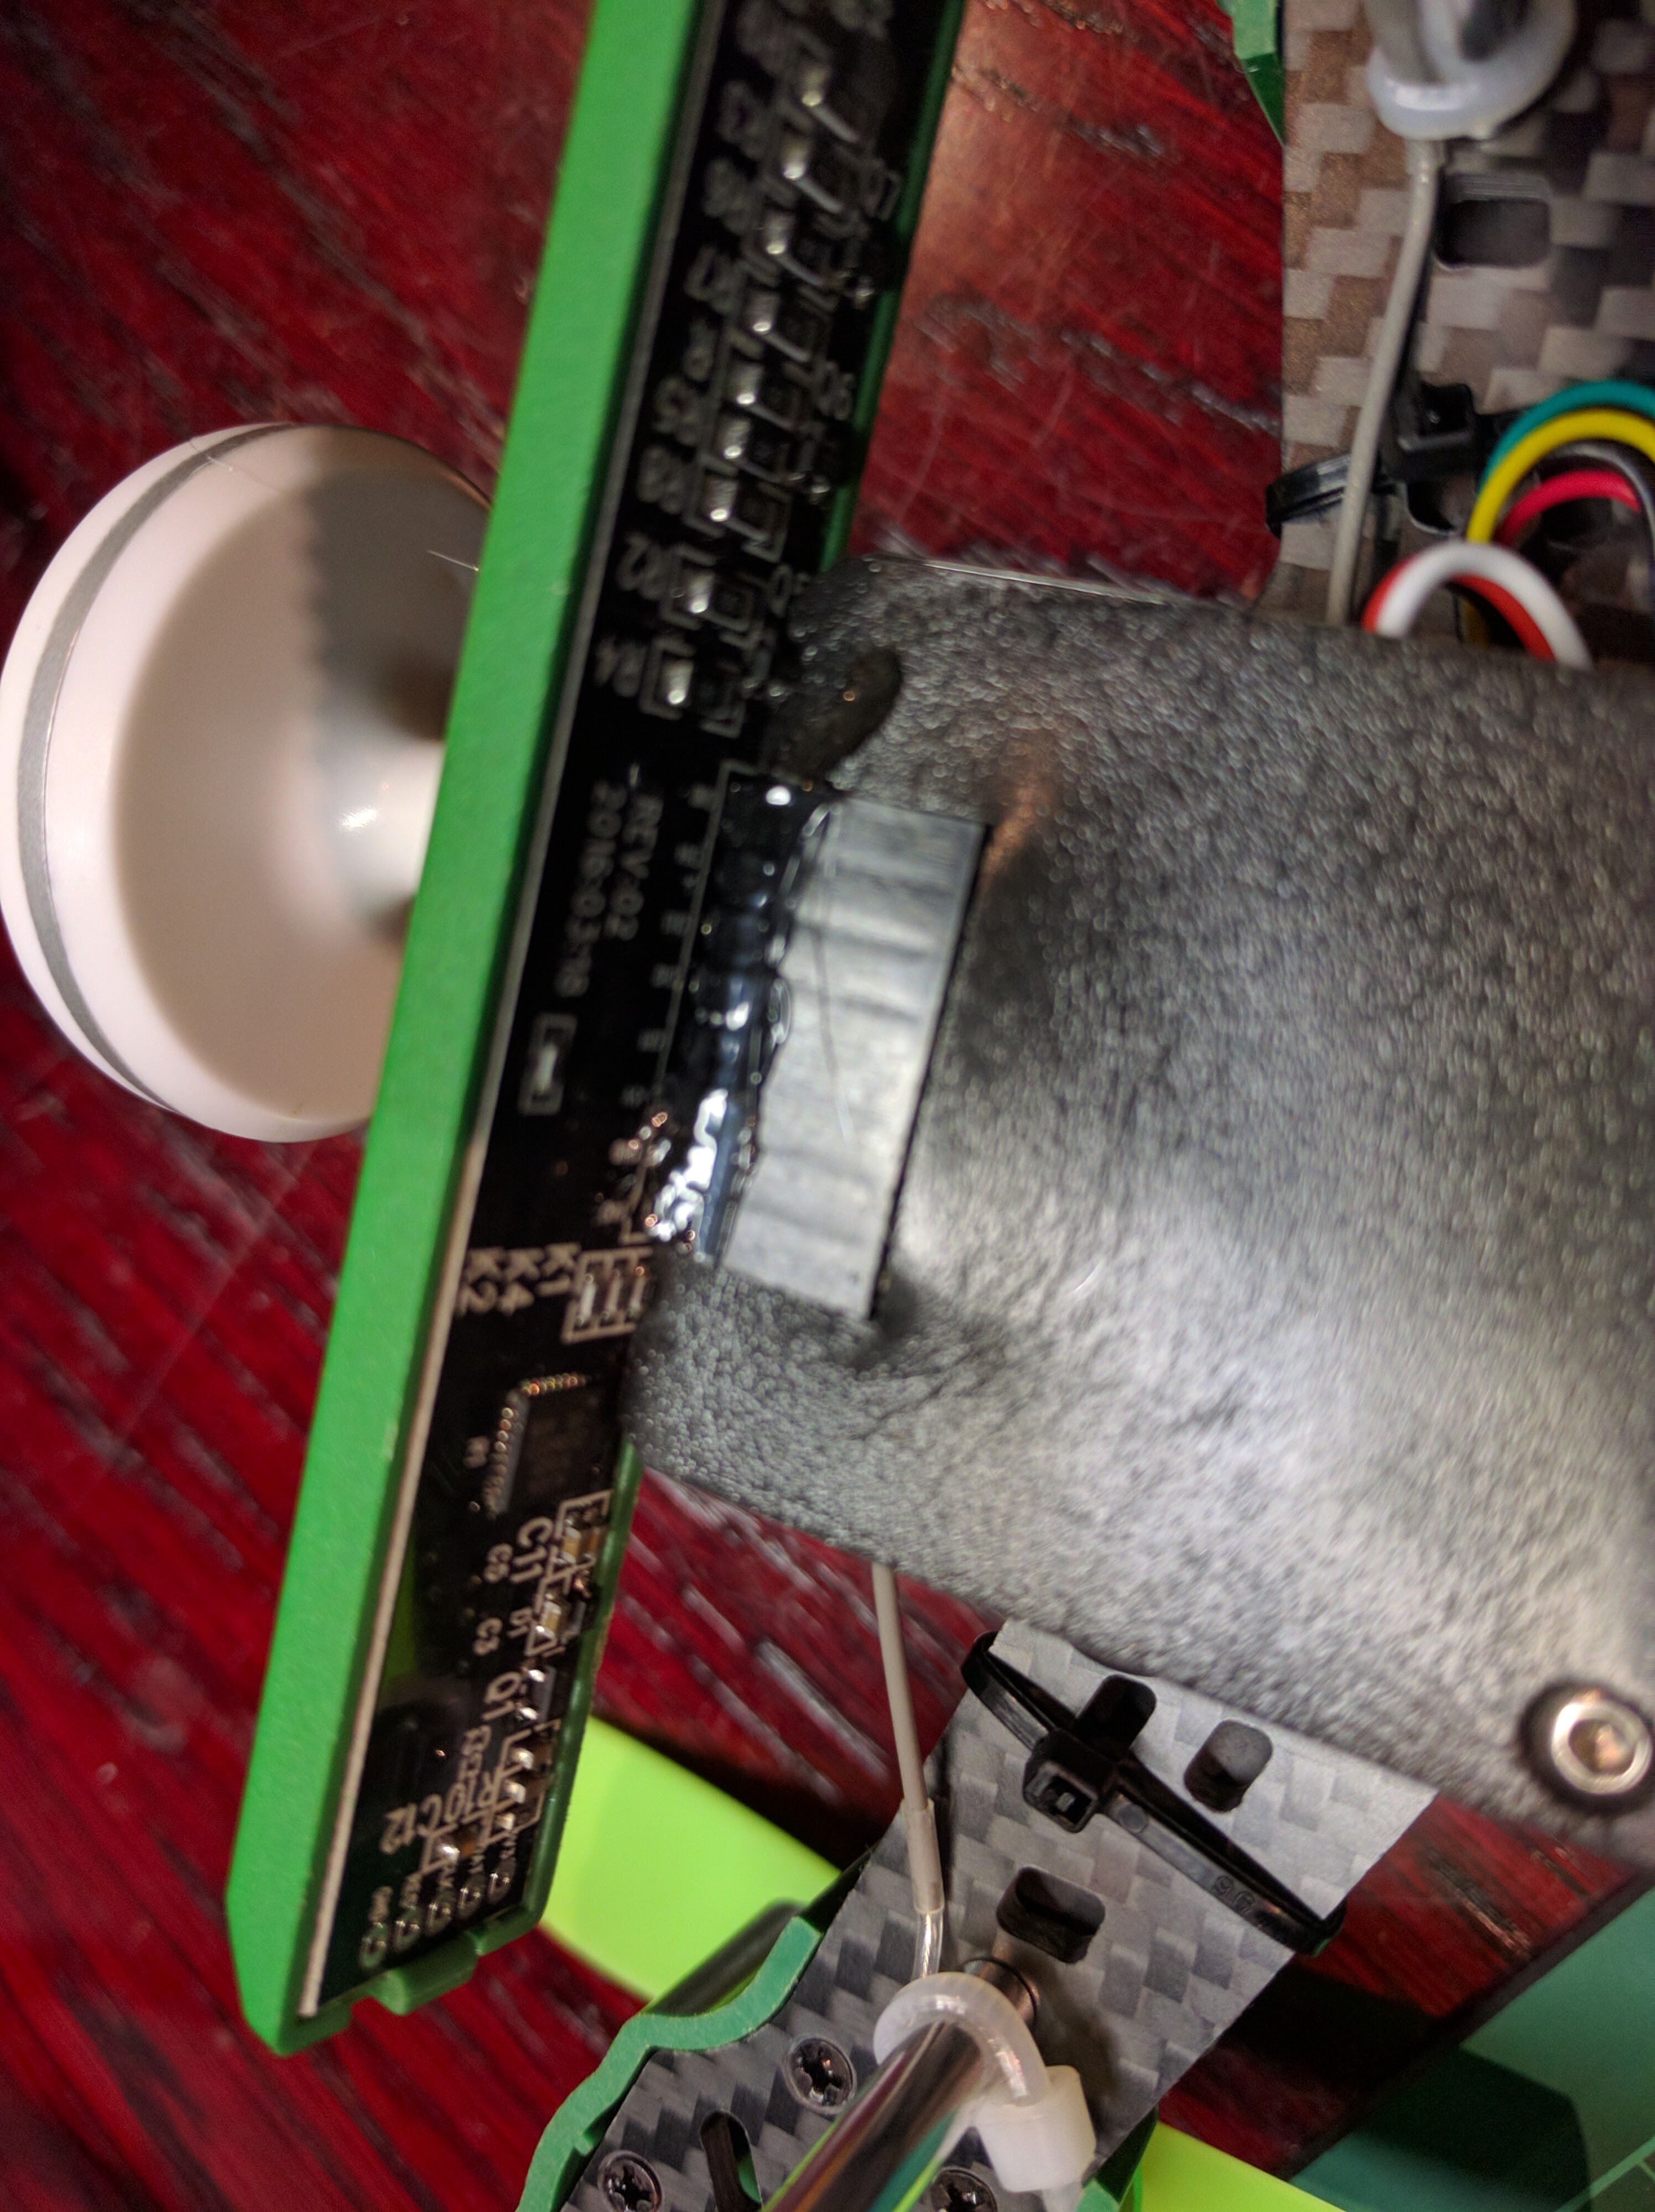
Pull the cables through the back near aerial instead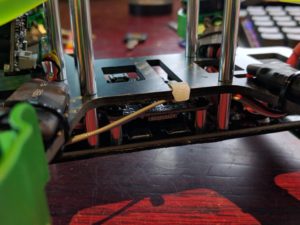
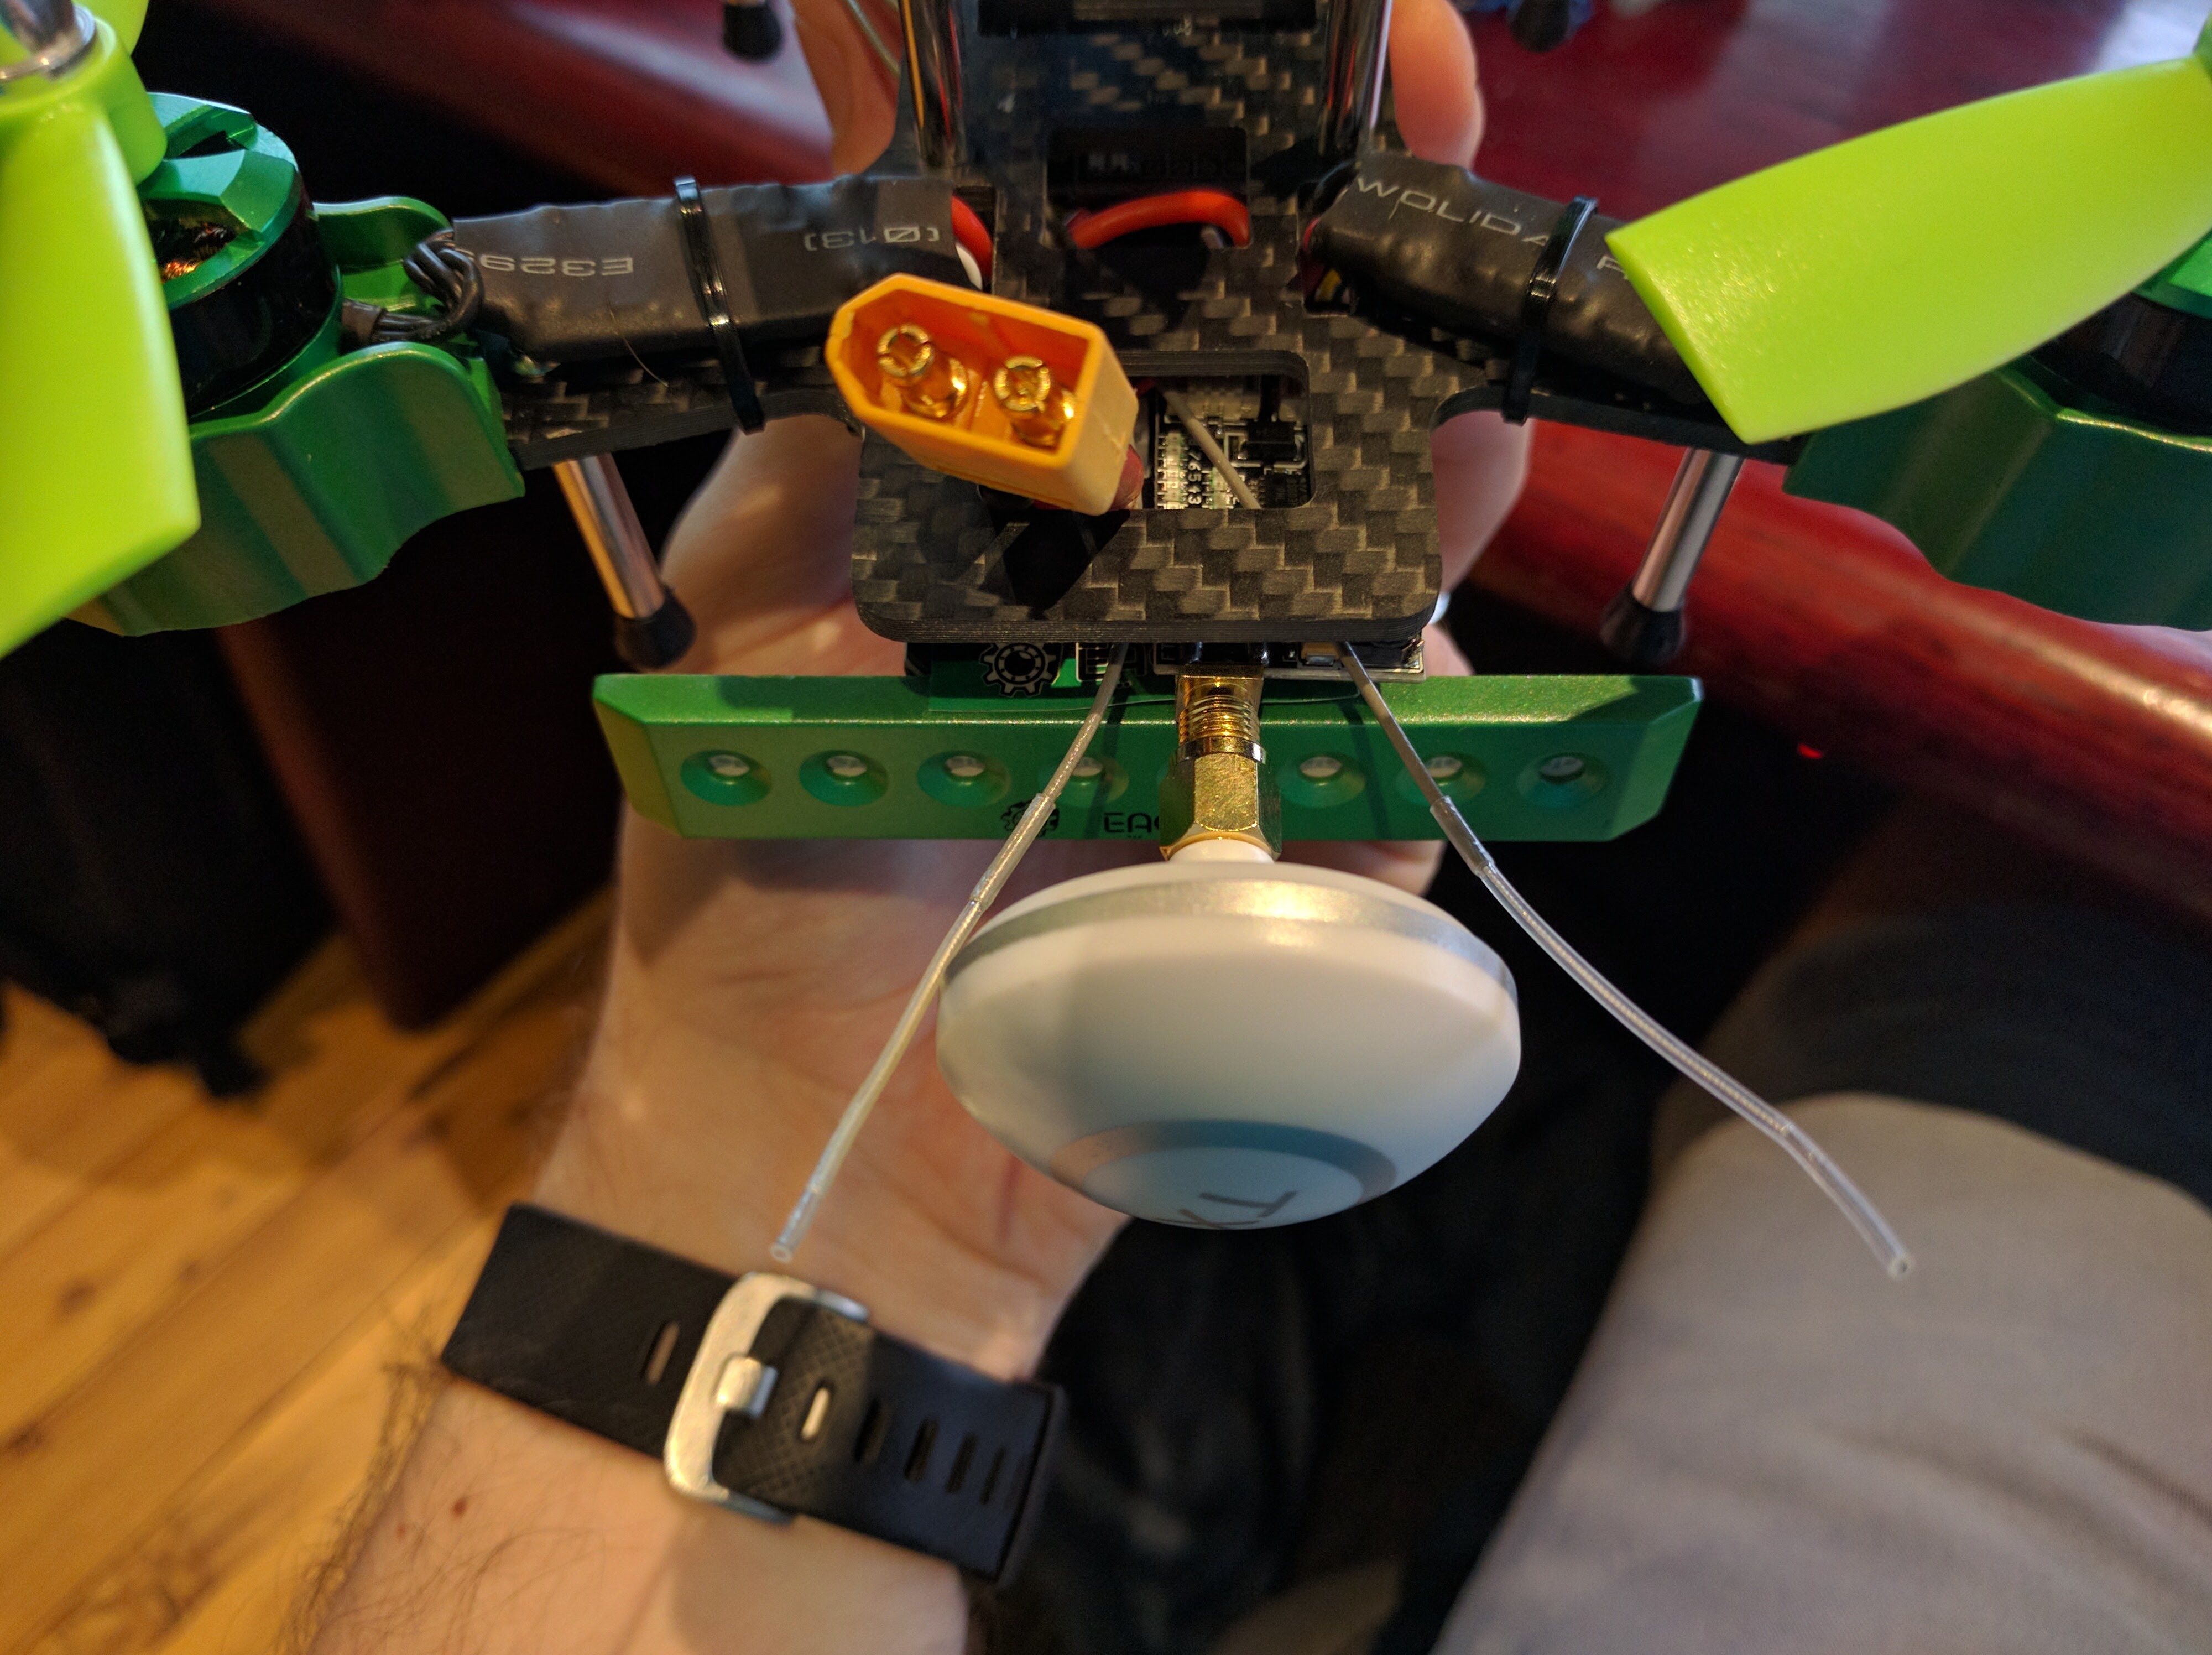
Cable tie and make it neat
Cable tie to the side legs. - See step 7.
- This last stage is quite a bit of work, but hang in there. We are going to convert the baseflight to the latest Cleanflight 2.8, set it all up and configure the switches.
Convert Eachine 180 Falcon Nazd32 Baseflight to Cleanflight


- Remove Props from Quad.
- Install the Cleanflight Configurator from the Chrome Web Store.
- Download Latest cleanflight or Betaflight _NAZE.hex from release pages.
For difference on Cleanflight vs Betaflight view this article. - In Cleanflight Configuration, make sure you disconnect from your quad, then click the firmware flasher tab.
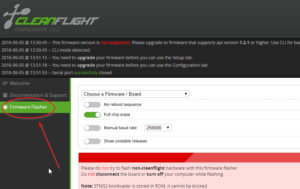
- Click Load Firmware [Local]
- Select file you downloaded from Step 3.
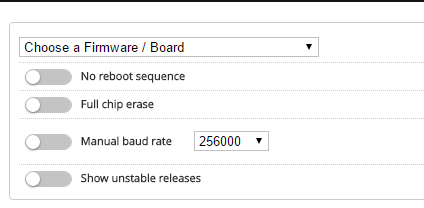
- Select These options as per screenshot
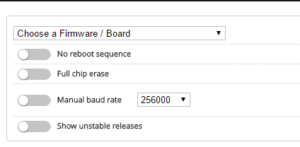
- Click Flash Firmware
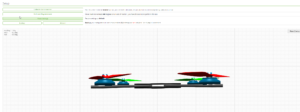
- You are now on Cleanflight/Betaflight!
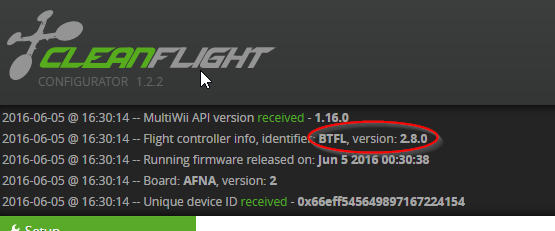
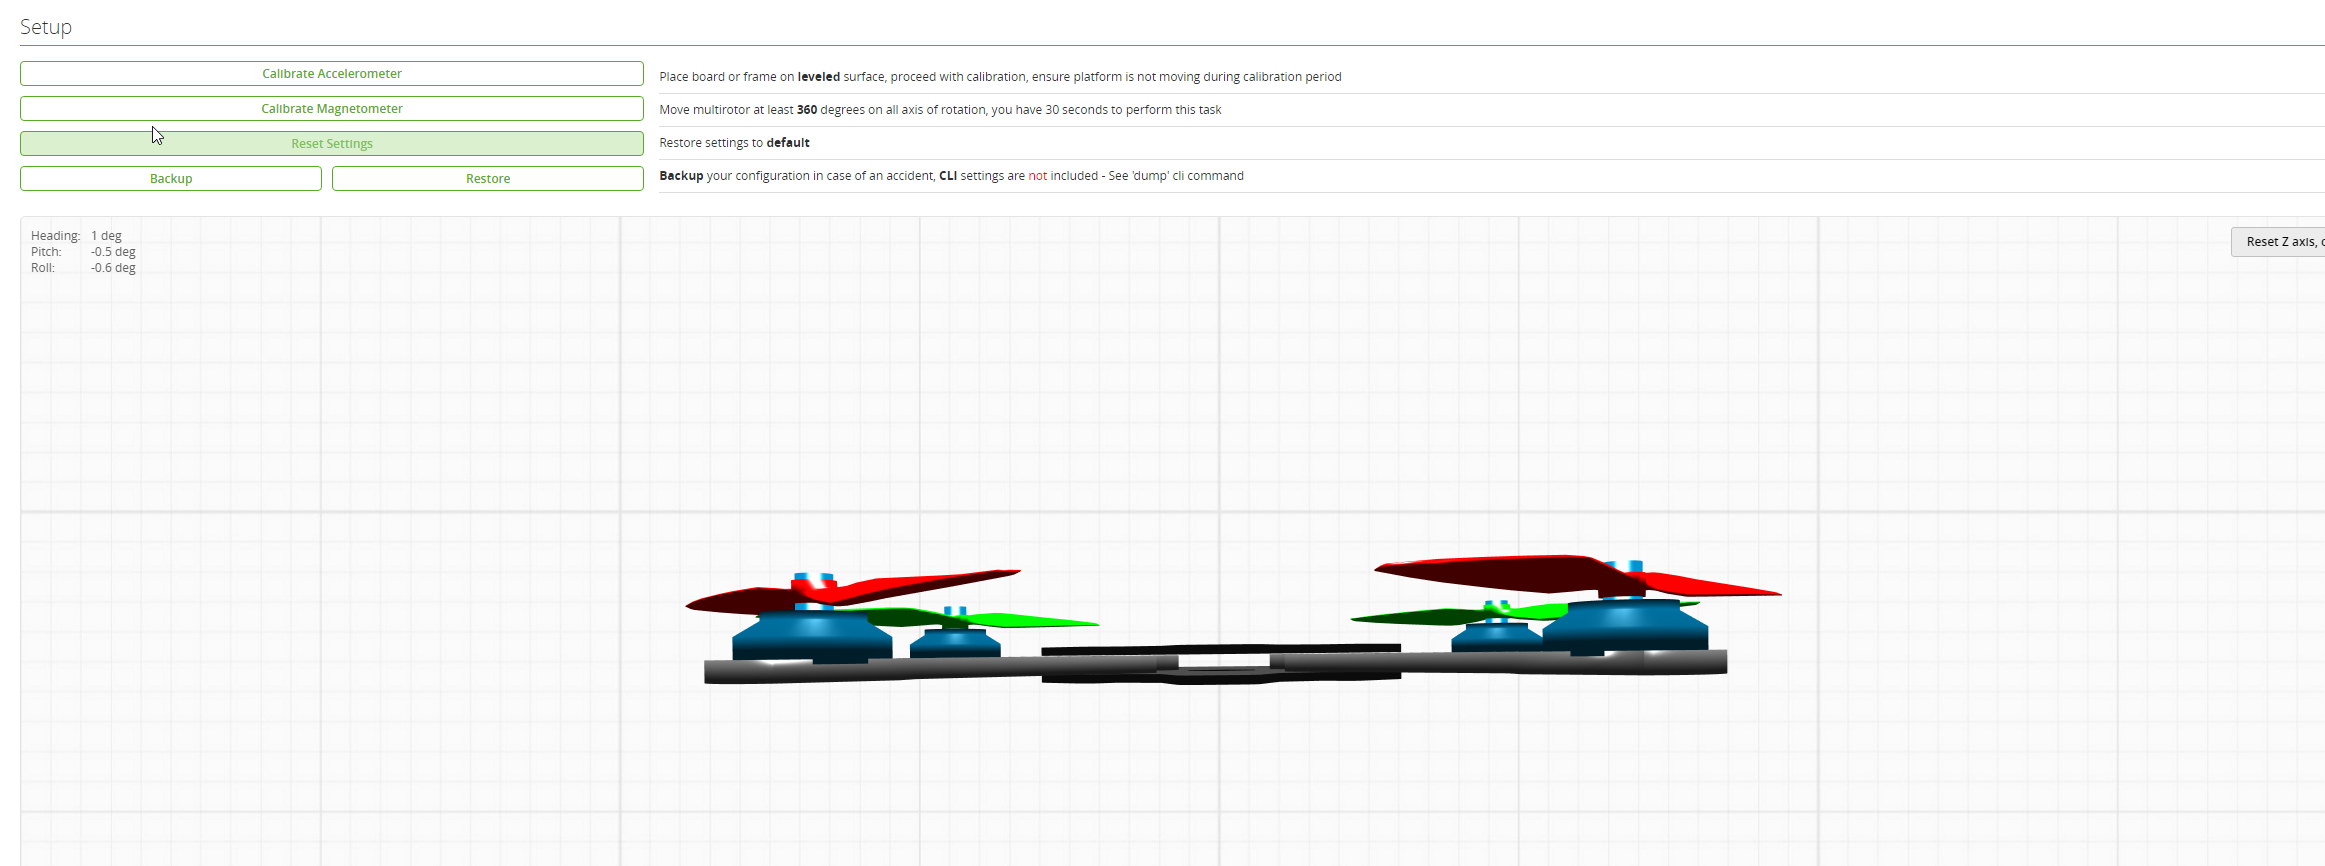
- Click Connect at the top right and if successful you should see your quad like this
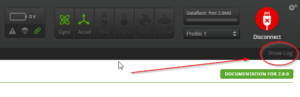
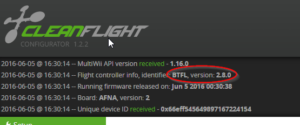
- You can check what version the chip is running by expanding the log
- Place Quad on flat surface and under setup, click calibrate accelerometer.
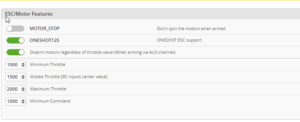
- Go to Configration tab
Change minimum throttle to 1050
Change Maximum throttle to 1950
Save and reboot
Your screen should look like this
- Now we need to calibrate ESC, go to the motor tab. remember, you should have removed props at the start, if you didn’t, DO THIS NOW.
Unplug battery
Click “I Understand the risks …….”
Slide Master to MAX
Plug in battery, wait till you have heard all different types of beeps.
Slide Master to MIN
ESC Calibration is now complete, however you must test that it has worked correctly.Click master, then push the up arrow on your keyboard. You are checking that all motors spin at the same throttle input. Mine All turned on at 1048, correct!
If they come on at different throttle inputs, redo your calibration. - Now go back to the Configuration tab
Change minimum throttle to 1050
Change Maximum throttle to 1935
Save and reboot - Next go to the Failsafe tab
Check you are happy with what the failsafe is. I like it to slowly land, others like it to drop. There is pros and cons to both. Research what you want 🙂 - Next go to PID Tuning
Change roll rate to 0.80
Change pitch rate to 0.80
Change YAW rate to 0.40
TPA should be 0.20
TPA breakpoint should be 1650You can up these rates more if you like.Now set your PIDS to this. Please note this was for Betaflight 2.8.0 Be careful as different firmware will need different PIDS.
- Now go to receiver tab, and check all your transmitter channels are correct.
- Since we changed the knobs to switches for AUX 1 and AUX 2, we can now move on to next section and setup the switches.
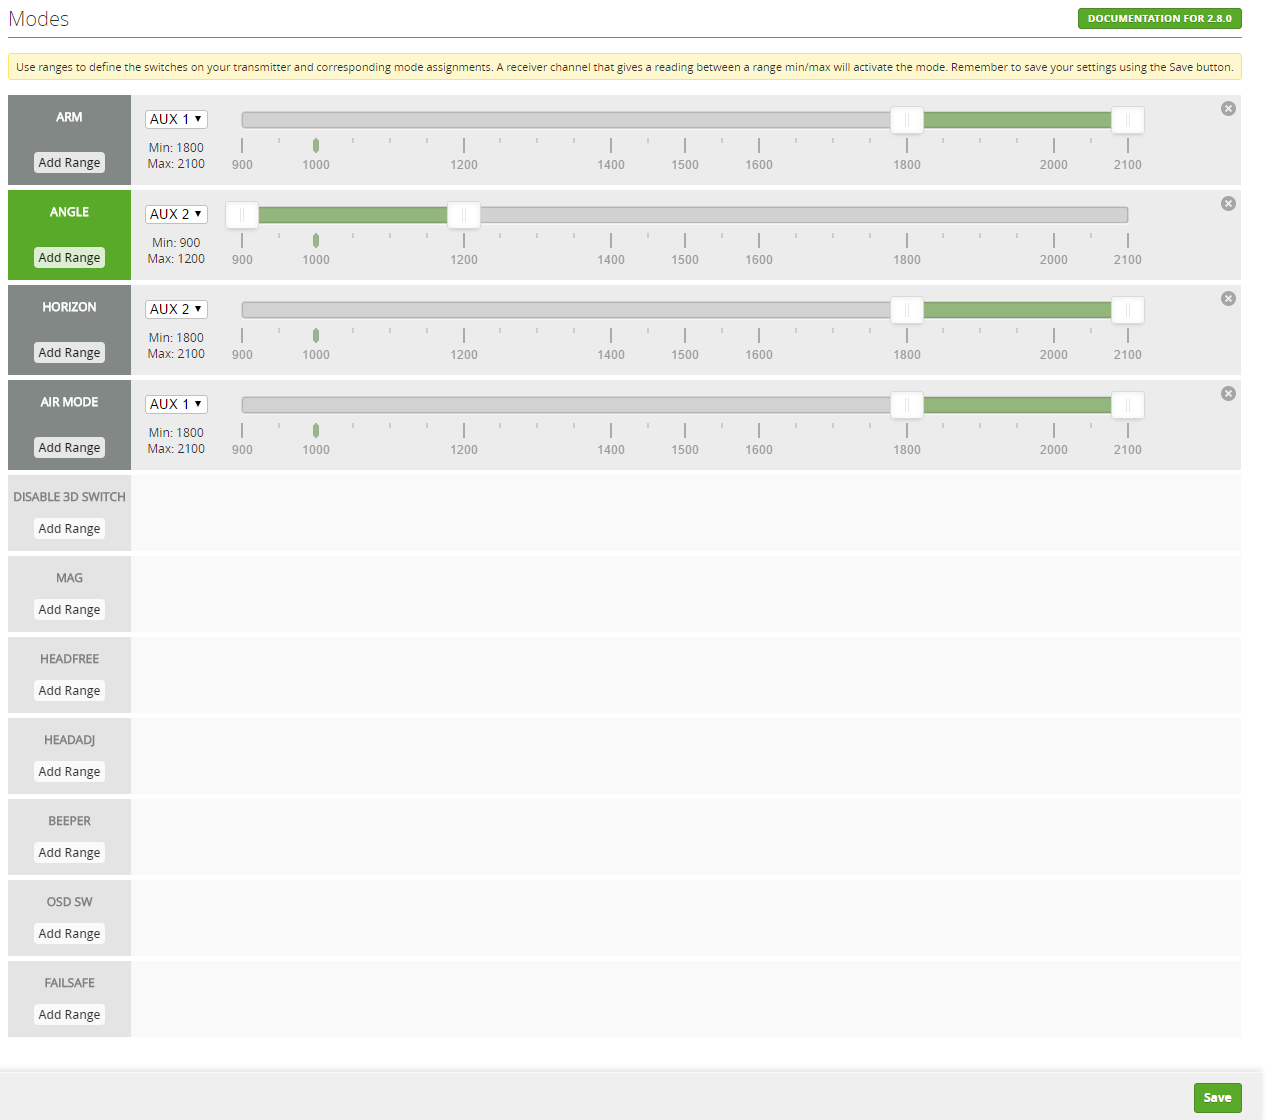
- Go to The Modes TabFYI, No mode selected = ACRO+ / Rate mode by default.
Altitude mode = Angle Mode
Rattitude mode = Horizon ModeIn the below screenshot I have setup the following for my switches.
SWB 1 = Nothing
SWB 2 = Quad Armed
SWC 1 = Angle
SWC 2 = ACRO/RATE
SWC 3 = Horizon

If you are a more advanced Pilot, you may want to change SWB 2 to Airmode and still use the Yaw right, Yaw left to arm and disarm. - Other Notes
Unfortunately this quad does not have a buzzer so we can’t use that feature.
It does have LED control, however when using Betaflight it seems if PWM for the receiver is being used, LED_strip can’t be used so the LEDS will just stay blue. - Give it a test flight! Make sure you are open space in case you missed a step and it crashes.


Default Falcon 180 Baseflight Configuration Screenshots
First Page
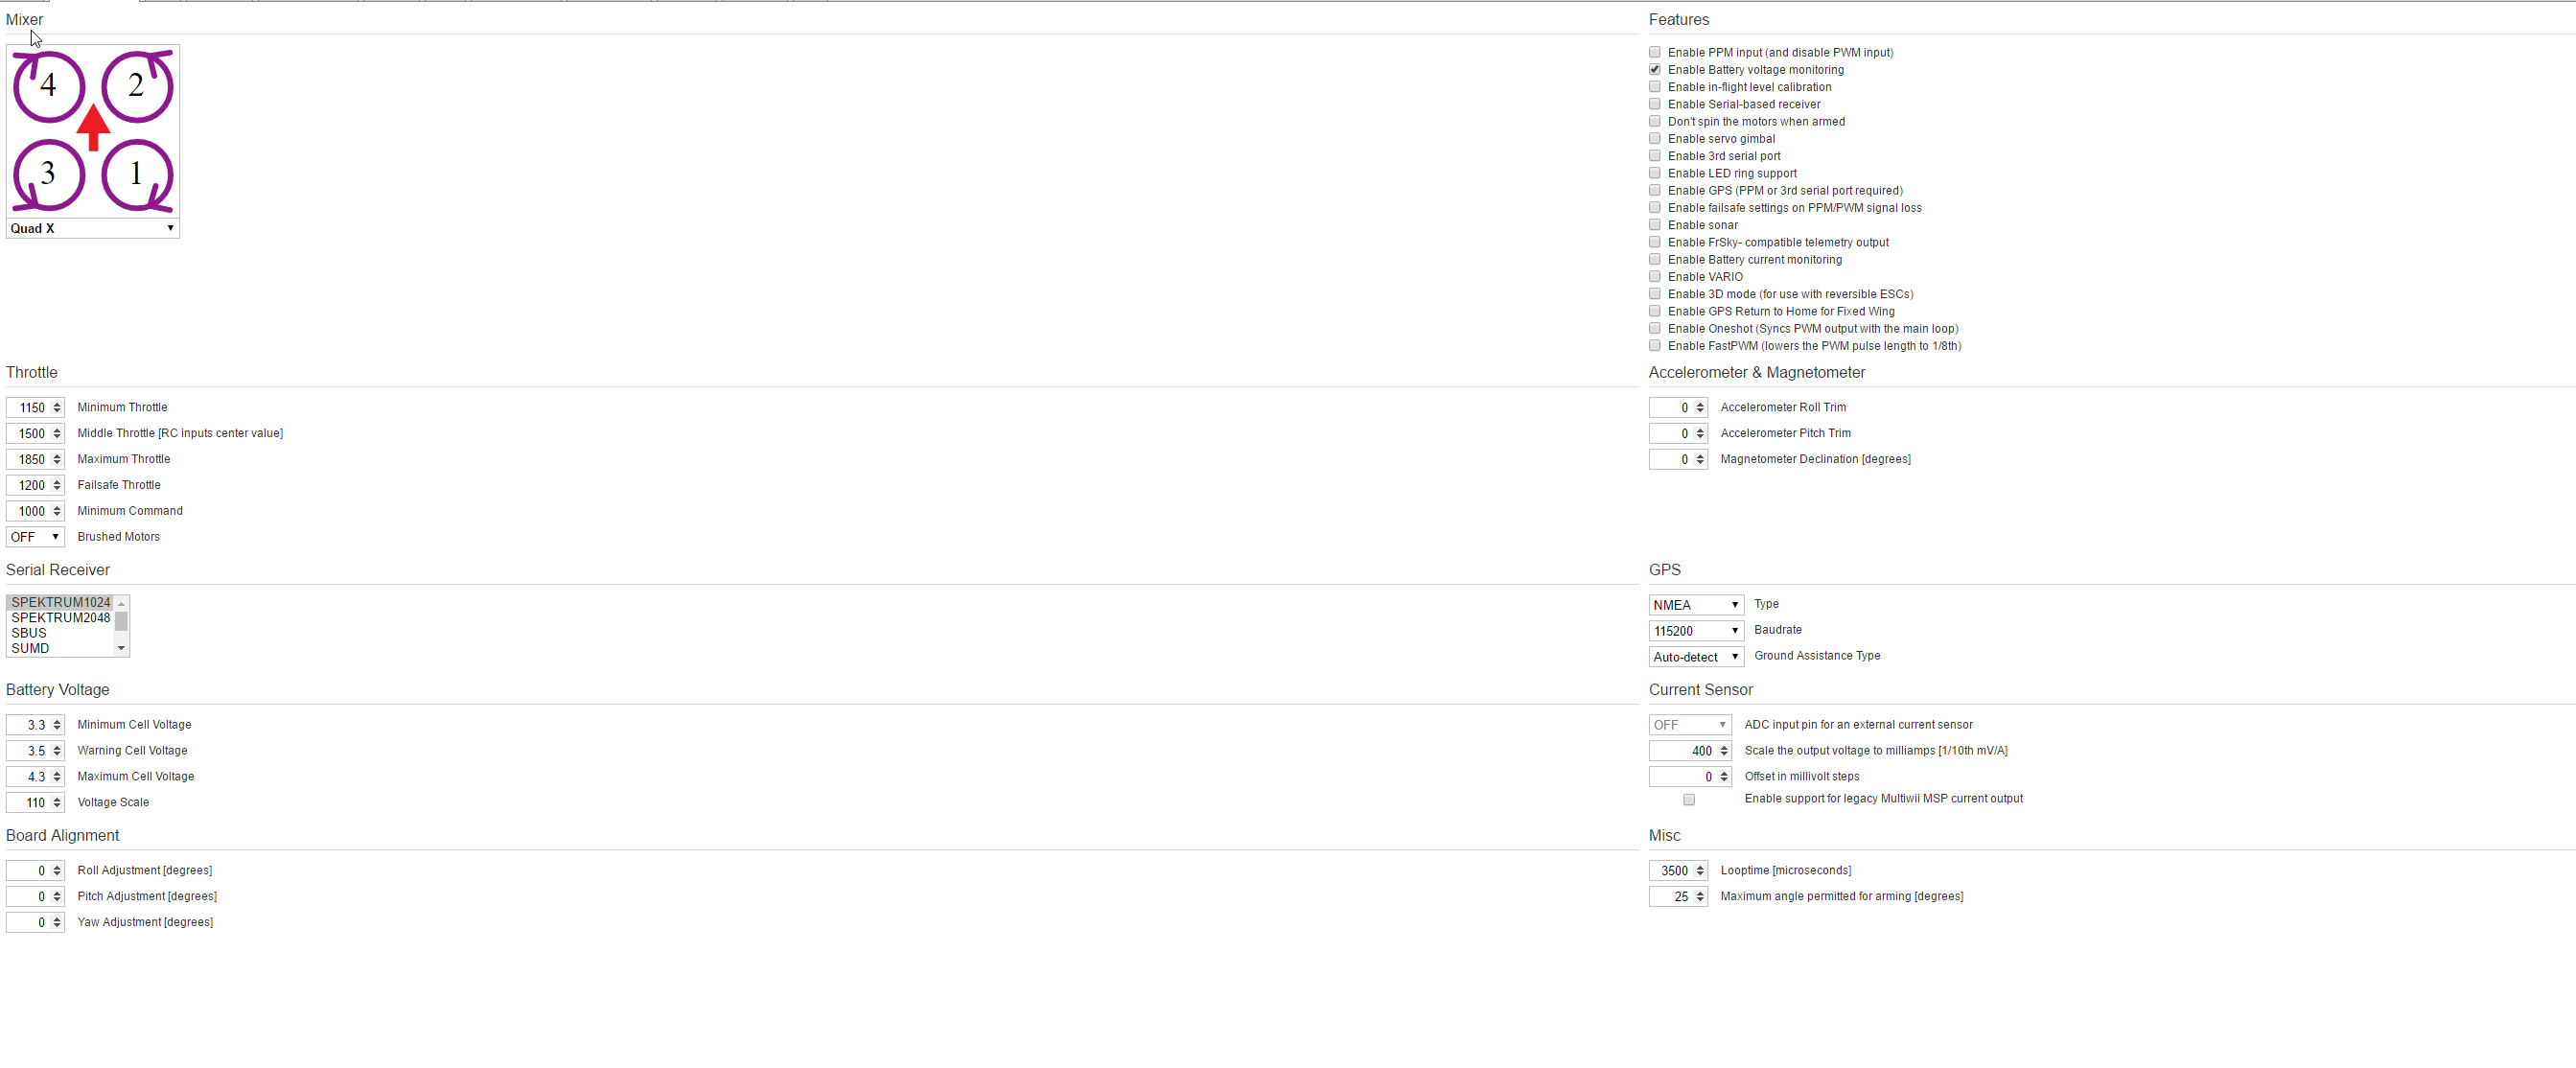
Configuration
![]()
Modes
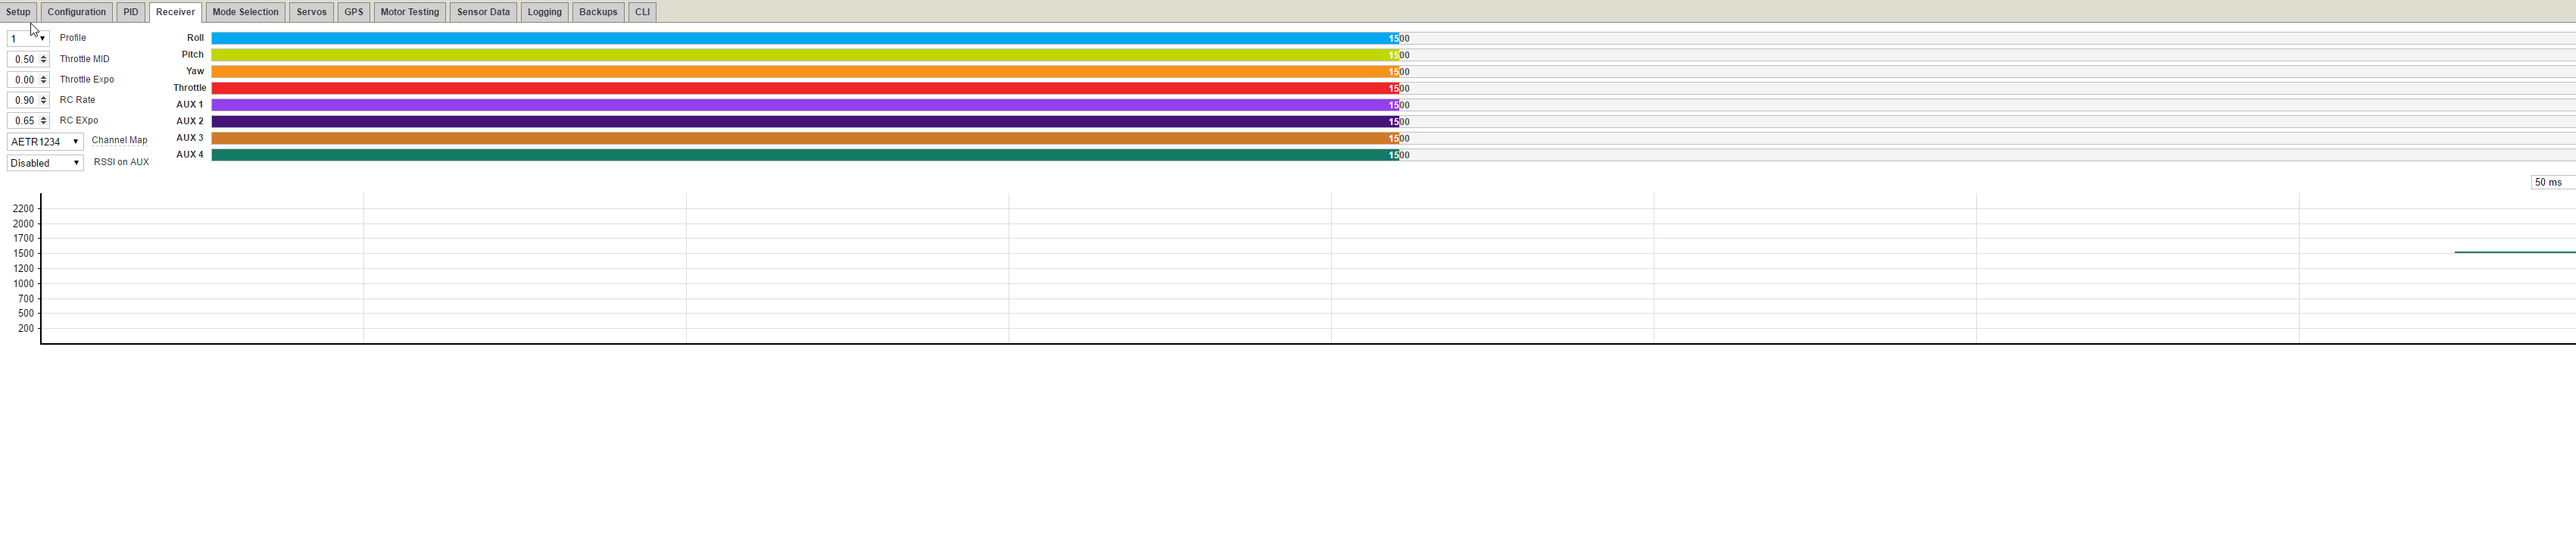
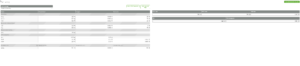
Receiver

PIDS
What about SP Racing F3 version?
I’m not sure what software/version they have put on them, but the guide would be the same none the less.
hi i am interested in buying this drone but i have a few questions,
Firstly i am new to flying FPV so does the have a beginner mode, And second is this REALLY ready to fly because i ordered a racing drone from hobby king and when you took off it just buried itself in the ground.
Thanks Sebastian
It is best to practice on a mini drone first such as this: http://shop.phasercomputers.com.au/products/eachine-h8-mini-headless-mode-2-4g-4ch-6-axis-rc-quadcopter-rtf
All the racing ones have stabalise mode, but you need to learn to fly first with something smaller!
yes i know how to fly
Is this really rtf i am experienced
Hello
is this drone compatible with Eachine VR-007 fpv googles
yep!
Hi there,
So what would be a good PID setting for a 4s set up with naze32 (if possible) on the 180 falcon? Iv got the already updated version from you guys running the 3s and love it I just think it’s time now for a 4s.
The same PIDS should be fine.
If you are having issues, please follow this video
https://www.youtube.com/watch?v=8o0WWl5c12Y
In the above steps I can not seem to get the PID settings in the decimal you describe,
example 0.009 and i can only get it down to 1 and up to 100 with no decimals.
Also when calibrating the esc when i slide the master bar up then connect the battery i get no beeping as described and after re-calibrating again and again the motors continue to engage at different times. I’m using configurator 1.2.3 , version 1.13 this is the latest version i believe.
It looks like the newest version of Cleanflight , 1.2.3 has changed the way the values are displayed. They are using integers, whole numbers to make things easier/consistent
To convert, move the decimal point to the right to give you a whole number.
(P) move 1 place to the right, 4.5 becomes 45
(I) move 3 places to the right, 0,009 becomes 9
(D) already an integer, just use the number, 25 is 25
I’ve taken my Falcon 180 out for a quick LOS flight earlier with these settings:
ROLL 45,9,25
PITCH 62,12,26
YAW 90,30,20
And fly’s really, really well. So am sure this is how its suppose to work 🙂
And the esc calibration? For the life of me I could not get the motors to spin up at the same time. After sliding the master bar to full then plugging in the battery I got no beeping as described, I’m thinking the fact I’m getting no beeping is why the calibration is not working. Iv gone through your steps about 10 times.
Hi David!
Your flight controller may be powering your ESCS which sometimes doesnt let you do it.
In this case you need to follow this guide – http://www.phasercomputers.com.au/2016/05/calibrate-escs-flight-controller-powers-esc/
Some NAZE rev 6’s do this for some reason. It was a “feature” that people wanted, but then it got more annoying so they removed it again.
How to arm drone with your mode setup.
If you have followed our guide you will see in step 20 we set arm and disarm to switch SWB 2 = Quad Armed
Thank You for quick answer. Please tell me what is wrong, when I’m arming with SWB2 (thr=0%) props are spining. When I’m arming default with left stick (right down)prosp aren’t spinig.
It’s because in first tab of cleanflight you have motor stop turned off. Thats how most people fly. When quad is armed, props spin at idle speed.
Hello, great write up. I am having one major issue. I have successfully connected to clean flight changed pids etc. when I power on qua the LED”s are solid blue. As soon as I turn on transmitter, the leds blink as if I was turning left. I have a SPracingf3 fc PLEASE HELP! Thank you
on the reciever tab i do not get any change when i move the sticks, the leds on the back of the quad chang but nothing on the screen.
Good day
I’m having trouble with my assassin 180
I upgraded my firmware some time ago after changing radio I fitted the new RX and tried to check the setup in cleanflight
I go the message that I need to upgrade the firmware and I did not I cannot connect to the NAZE controller at all
it says opening port, communication timed, out closing port
Tried to update firmware again and got the following message No response from bootloader
I did make sure that the configuration plug is plugged in
Still no response
Please help
First thing. I can’t get the eachine i6 to the settings. Not even moving the yaw and trim while turning it on. That doesn’t work. Also I can’t get the moters unlocked. Supposedly all you do is move both sticks down and into the center
This doesn’t work
Sssssooo frustrated right now.