This build log will cover the various build steps in the Emax Nighthawk X Frame Kits
We sell the EMAX X5 & X6 RTF and this guide helps to show the professionalism and amount of work required to put one together. The guide assumes the reader has some skill and basic equipment available if building the quad themselves.
1. Components
- 1 x Emax Nighthawk X5/X6 frame kit
- 4 x DYS SE2205 2300kv FPV Racing Motors
- 4 x DYS XMS30a Esc 30A Blheli oneshot solder version
- 1 x EMAX Skyline F3 Flight Controller (Acro)
- 1 x FrSky XSR 2.4GHz 16CH ACCST Receiver with S-Bus and CPPM
- 1 x Foxeer HS1177 XAT600M DC5V-22V 600tvl Sony Super HAD CCD FPV Camera IR Block 2.8mm Lens PAL
- 1 x Adjustable 25/200/600mw VTX “Rhys Special” – Can change channels before transmittingAssorted hook up wire and consumables.
2. Unboxing.
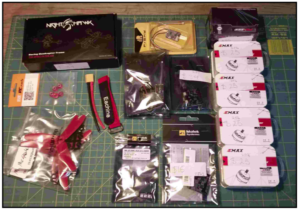
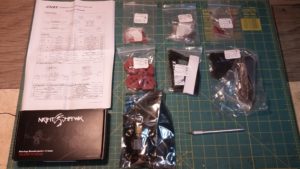
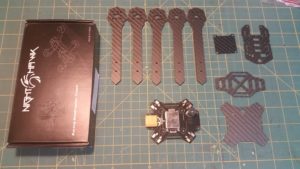
Open your Emax box and check that all the parts are there. Emax have been generous enough to supply extra parts including an extra arm. You should have the following components along with a assembly diagram.
3. PCB/PDB
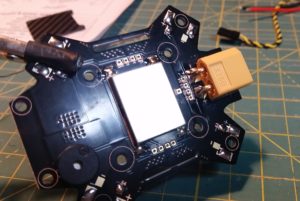
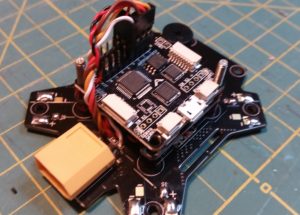
Go over you PCB to ensure components have been installed correctly and securely. I found my XT60 connector was loose and had not been soldered well on the underside. I also added some solder to the top side. The plug will be under a certain amount of stress every connect and disconnect, especially if you have poor technique or rush to disconnect etc. I also tinned the ESC + and – pads along with the + and – signal pads (- signal pad shown untinned).
Once you are happy with the components I like to insulate them where possible. As most components will connect to the positive and negative terminal of our source they are at risk of short circuit if left open. Every chance you have to minimize this happening is advisable as the best case scenario in a short is falling out of the sky, and the worst case is fire/explosion.
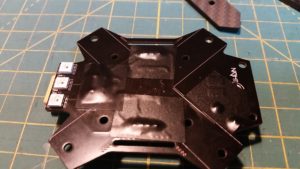
Take note that carbon fiber is conductive. The outer surface is usually coated but if that coating is worn off you can have problems. With exposed or sharp solder joints coupled with vibrations this can lead to the carbon fiber shorting out exposed connections if not taken into consideration. Also consider the unlikely chance of a metallic/conductive item somehow getting lodged in places it shouldn’t be. And there is always the crash scenario, where things end up where they shouldn’t be. Even though the pins below aren’t in direct contact with carbon/metal I like to cover them with some electrical tape or silicone.
4. Preparing the FC
You should now examine your choice of flight controller and note the position of the usb connection, along with any other necessary ports making sure once everything is assembled you still have access, especially to the USB connector. I am using the SP F3 board which has a number of ports that exit parallel to the board, meaning we need to keep the edges clear if we desire to use those port without serious modification.
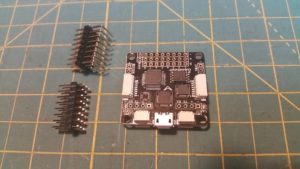
For the motor pins you have a choice of perpendicular or parallel pin headers, or you can solder direct wire connections for an ultra clean finish if you feel up to the task. If this is your first build or you are uncertain of some of the connections it is advisable to select the pin option, allowing you to switch servo/dupont connectors out and correct any minor mistakes easily. Once soldered to the board it is advised to not attempt to remove unless you have the right equipment and skill.
In this iteration I have chosen to use the straight header pins as we have more room vertically than horizontally in this build. If you haven’t soldered before then don’t “learn” (i.e destroy) your flight controller. There are alot of sensitive components which are susceptible to heat and tight spacing of pins, its easy to over heat the pads causing them to tear off the PCB or bridge pads (short circuit) or damage ICs. Fixing any of the above is not for those with limited experience or equipment.
Once you have finished its a good idea to inspect your work, as a short circuit or dab of solder in the wrong place can fry your board beyond repair of the common man upon initial power up. Not shown here is the pins marked vbat and buzzer. Don’t forget to populate them as you will need them later.
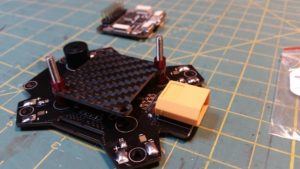
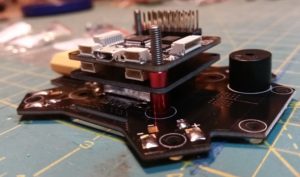
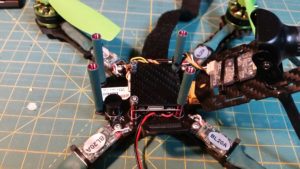
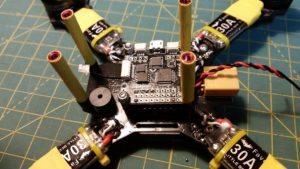
Its a good idea to do a test mounting of your flight controller at some stage. This is helpful for a few reasons. It allows you to visualize your connections, keeping the wire salad to a minimum and it also helps you visualize any conflicts or obstructions that may come about later. The manual shows the flight controller being mounted as so (some spacers missing in the picture below). Make sure your spacers are correct, the larger spacer goes on first.
*Your PCB/FC stack in this instance will not reach the adequate height if the correct spacers are not used, leaving you with a top plate that will not be level. Some modification or replacement of the standoff may be required to keep the top plate level if you choose to do so.
*You need to make sure that the FCs underbelly cannot come into contact with the PCBs SMPS shield (the steel case) as the FC has bare solder points, and poses a short circuit risk.
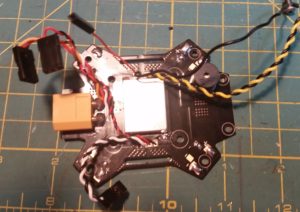
Once you are happy with your work you can layout your connectors and get a rough idea of lengths and routes. Here you can see the first 3 motor pins connected. These with connect to our first 3 ESCs and are tasked with relaying the signals from the flight controller to each ESC. For our quadcopter we will need 4 wires, one for each motor, so if you have a 4 pin dupont (servo) connector you can use that or you can get away with 2 x 3 pins, which are generally more common than the 4. Measuring out the cable length is a good idea, remember with pins you will need some play so that you can remove the cable. If the connection is too tight it can also transfer vibrations to the FC throwing off all the sensors. So err on the side of too long rather than too short. Remove the flight controller and lightly tin the end of your wire, leaving it nice and thin so it can still get through the PDB/PCB. I use a little bit of blue tac to hold it in place as I flip the board and solder it on the other side.
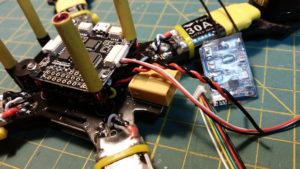
You can solder the first three into S1/S2/S3 on the PDB and use a servo connector to hook them up to the FCs corresponding pins (motor 1,2 and 3). I solder S4 in and using another 3 pin servo connector I insert it into pin 4 of the FC but perpendicular to the first connector. I now solder into the 5V +/- and hook them up to this perpendicular servo connector. So pin 4 of the FC has 1 x ESC connection and the +/- regulated 5V to power the FC. The + is the center pin, double check you have it right. You can go ahead and solder cables to all the remaining spots on the FC. There is 12v and 5v regulated, Vbat, RGB and 2 pins marked 5v and Beep for the buzzer. Once you have soldered all your wires in you can replace the FC and check your connections fit.
*For those with a little more skill and who may seek a little more room it is possible to reverse the FC stack so that the Carbon plate is on top. It will require soldering to the FC directly (no pins) and some preparation to make sure there are no shorts.
This is a handy place to mount your VTX later if desired. Thumbs up to Mick for the alternate layout idea.
5. Preparing Motors and ESCs.
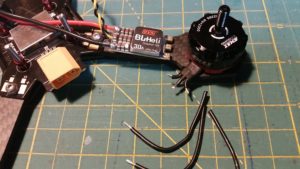
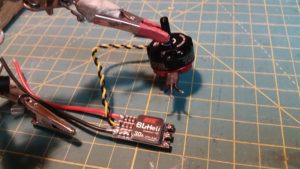
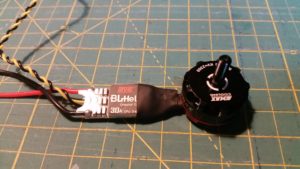
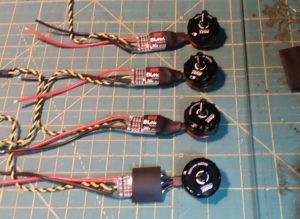
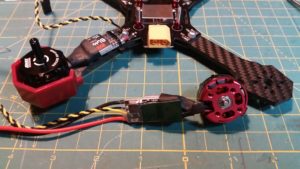
In this next step we will prepare our motors and ESCs for mounting on the arms of the quad. Because the quads PDB has connection pads for our ESCs close to the arm bolts you will need to check that your motor and ESC wire lengths fit. For a clean build, especially on the X5, it is adviseable to select ESCs with solder tabs to reduce the length and difficulty of the motor wire connections. Test mount the ESC and motor on the arm. Cut motor and ESC wires to length and pre tin your connections. Since we will be using BLheli you dont need to worry about which motor wire goes where. Just hook them up all the same and we will change motor direction later through the GUI.
Repeat this process for each arm/motor/ESC. Remember to insulate your connections with shrink wrap or at the very least electrical tape (not preferred due to it coming unstuck over time).
6. Final Assembly.
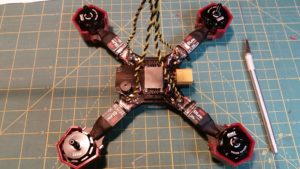
Once the motors and ESCs have been soldered and mounted with their power wires trimmed and tinned the frame can be assembled. Check that your are using the right bolts and that everything lines up before you tighten anything. The arms are designed to meet in the center and push up hard against each other to help spread the impact out better and not place so much stress on the bolts. For this reason it is advised that you put all arms in loosely before you do up the bolts tight as its hard to align them if you do it one at a time. If you choose to use the motor guards make sure your bolts are long enough to clear the arms but not damage the motors windings if screwed in too deep into the motor. Use a washer, split or otherwise to gain some clearance if you are unsure. You need at least 3 to 4 turns of the screw into the motor for good purchase.
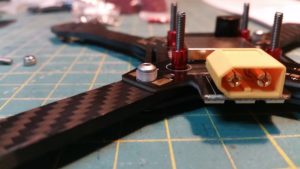
I chose to affix my arms slightly different from the manual. The positive and negative terminals for the ESCs are rather close and one of the bolts that passes through the arms is right in the middle of this, as seen below. Now if the screw is inserted with out a spacer or insulator it doesnt contact these pads. But its close, and depending if you come from the top or bottom, the nuts supplied are even closer. Take in mind that we will be soldering the ESC power wires directly to these pads and they will naturally solder higher than the pad as well. And these wires are directly connected to the source through low resistace traces/wires for maximum currents. So you can do a couple of things here:
First try to solder the ESC wires on the far edges of the pads, away from the bolt, and make sure there are no stray copper wires. And/or secondly, use a plastic nut to space the arm bolt off the surface of the PCB a little. Its all about proximity. The further you can remove them from each other the less chance of an accidental short. This is perhaps a little unnecessary, if you choose not to space the bolt at all just make sure the solder joins are clean and have no stray wires that can touch the bolt from either pad. Also, if you have the nut on top beware that the corners of the hexagon will protrude father than the bolts head. You can go a step further and silicone or electrically insulate these once connected.
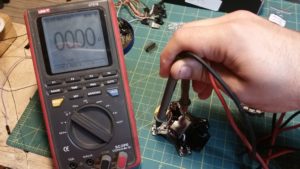
Once you have everything in place you can reinstall your flight controller and proceed to hook up all the connections.Of extreme importance is the polarity of the FCs regulated 5v input. Get it wrong and you will damage your FC upon power up. If you are concerned or confused about any of the connections you can use a DVM in continuity mode to check which cable is which.
7. Mounting the camera.
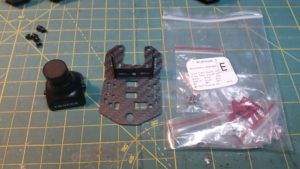
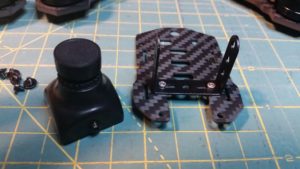
The cased Hs1177 camera comes with a mounting bracket that will bolt onto the top plate of the frame easily. I use the nuts and bolts that came with the kit. Make sure you use the nuts on the top of the frame as the camera wont clear them easily otherwise. Be careful with the metal bracket, it is easily distorted if you push too hard against it. The camera pops into the center holes of the plate and then is screwed into place with the supplied screws that come with the camera. Make sure the text on the back of the camera is the right way up or else your image will be upside down.
8. Connecting the receiver and RGB LEDs.
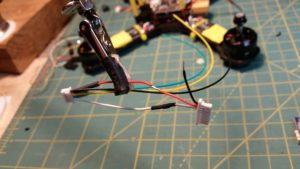
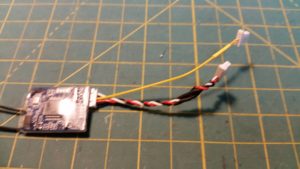
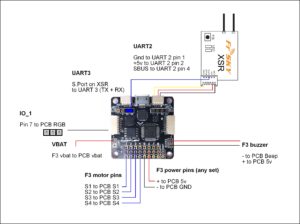
Im using the FRSky XSR RX in SBUS mode, and we will also hook up the Smart Port for telemetry back to the transmitter. Im mounting the RX next to the camera on the underside of the top plate. But first we need to alter the cable for a clean connection. The pinout is written on the XSR, and we will be connecting it to the UART2 port which has 4 pins. We will only be using 3. Pin 1 is -, pin 2 is + and pin 4 is our signal, it goes to the SBUS connector on the RX. Also we will connect the Smart Port from the XSR to UART 3s TX and RX pins (short them together). Measure out your cables and make sure you have enough length. And while your at it you can hook up the RGB connection from the PCB to pin 7 on IO_1 for LEDs. You can see the lonely black wire with connector in the last picture. We are still waiting to see if soft serial will be needed for correct LED output. Stay tuned.
9. VTX connections and mounting.
I usually leave the VTX off for testing. Once its installed there must always be an antenna installed or you risk damaging it. I have not included any pictures at this stage as there are multiple ways to connect and mount. Since the specs vary from transmitter to transmitter you need to check some basics before deciding a course of action. We have a regulated 12v free from the PCB and if the camera and VTX can support 12v in then it is straightforward. 12v + and – from the PCB to the + and – on the camera and VTX. If your VTX doesn’t support a pass through you will need to make a Y connection so you can send power to the camera as well. Then the video out from the camera (usually a yellow cable) is connected to the video in on the VTX. That’s it, you are ready for FPV!
Some general rules are:
Keep it and its cables away from other electronics if possible, separate from the RX (not always possible on the mini builds).
Gently twist the wiring harness but dont kink or have any sharp bends.
Mount the antenna protruding from the craft and keep it away from the props.
If you plan on flying with friends try and make the channel/band switch accessible so you can toggle between bands to support multiple craft in the air at the same time.

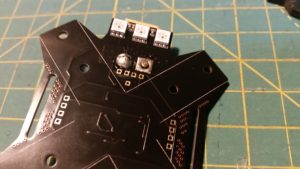
did you get the led to work?
yep. We have noticed alot are faulty out of the box however. Kind of pointless anyway because the led is in the wrong spot to be seen